Introduction
Acropolis File Services (AFS) enables you to share files across user work stations or VMs in a centralized protected location to eliminate the requirement for a third-party file server.
AFS uses a scale-out architecture that provides Server Message Block (SMB) file services to Windows clients for home share and user profiles. AFS consists of three or more file server VMs (FSVM) or also known as an AFS cluster. AFS supports multiple file server clusters creation.

The FSVMs manage a collection of shares distributed across multiple file server VMs. By default, a share is created for home directories for each file server. This share is distributed at the top-level directories. Shares created after the default share are distributed across the FSVMs at the share-level.
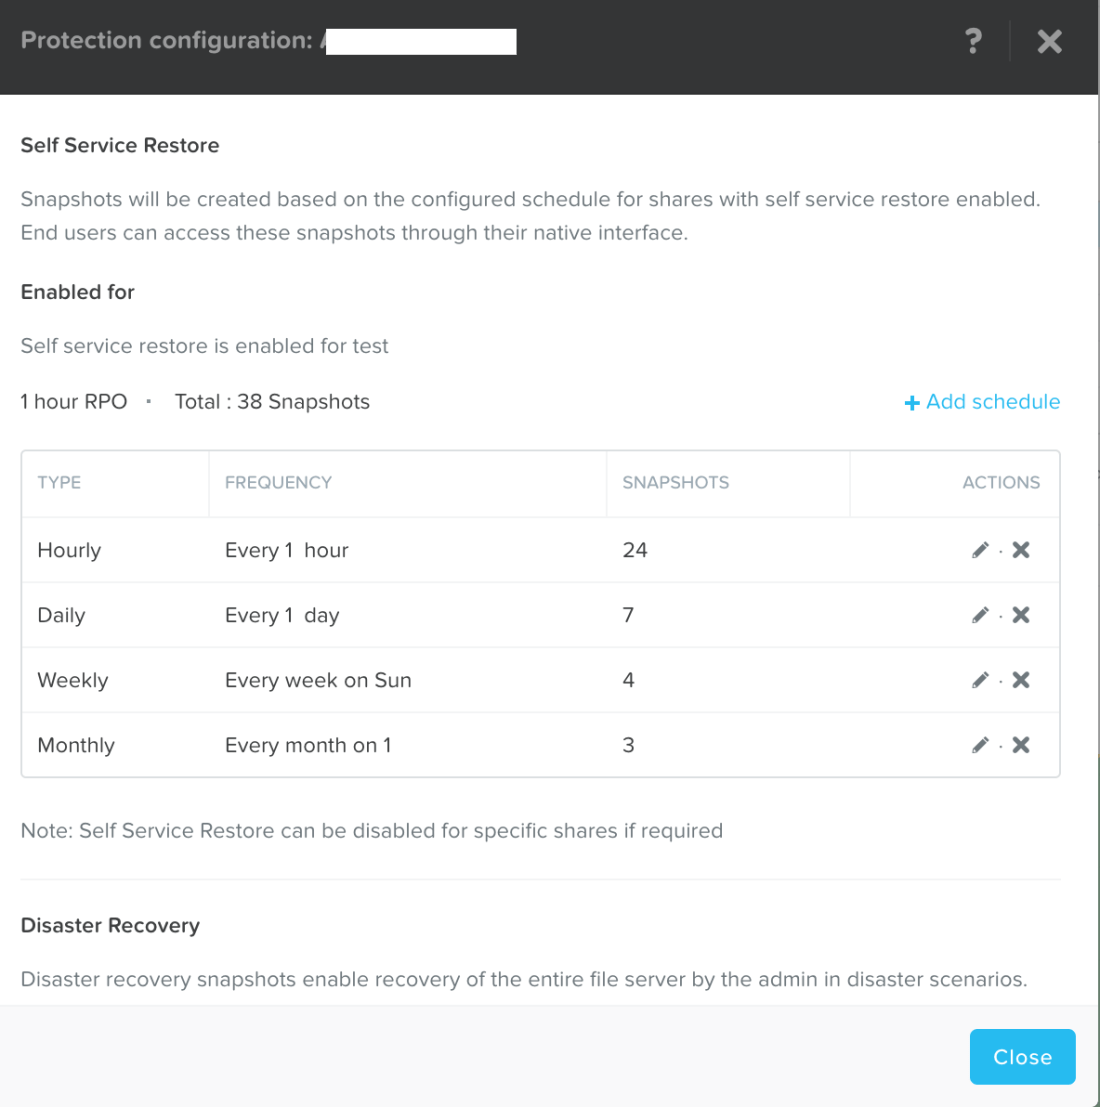
AFS takes snapshots of the stored cluster data at the file level. These snapshots are exposed to the share users through Self-Service Restore (SSR). SSR allows the share users to restore a file from any of the previous snapshots without an administrator. SSR is disabled by default, but can be enabled during or after share creation. AFS creates a snapshot every hour and retains the most recent 24 snapshots.
Features
AFS includes support for the following features.
- Security descriptors
- Alternate data streams
- Data streams
- OpLocks
- Shared-mode locks
- AHV
- ESXi
- Many-to-one Replication
File Shares
A file share is a folder that can be accessed by machines over a network. Access to these shares is controlled by special windows permissions called NTACLs, which are typically set by the Administrator. By default, Domain Administrators have full access and Domain users have read only access to home share. General purpose shares have full access to both Domain administrator and domain users.
Networking
AFS uses an external and storage network. The IP addresses are within the user-defined range for VLAN and IP addresses.
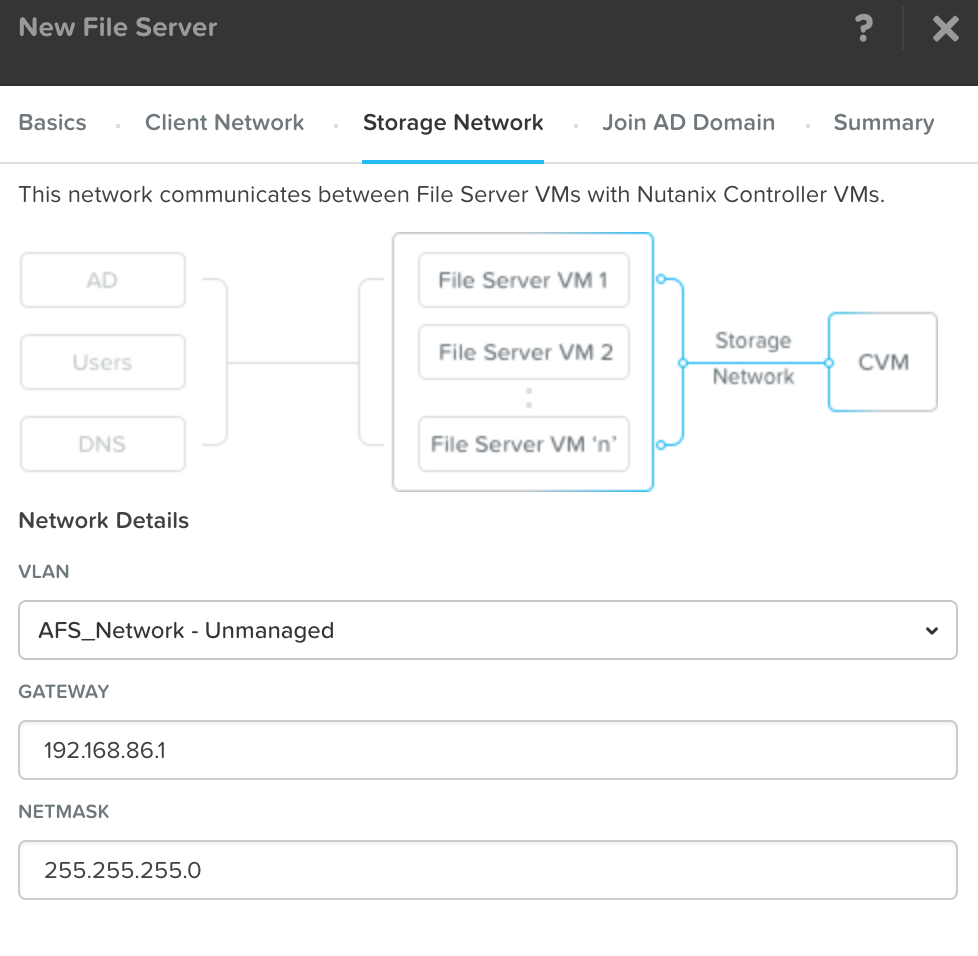
- Storage network: The storage network enables communication between the file server VMs and the Controller VM.
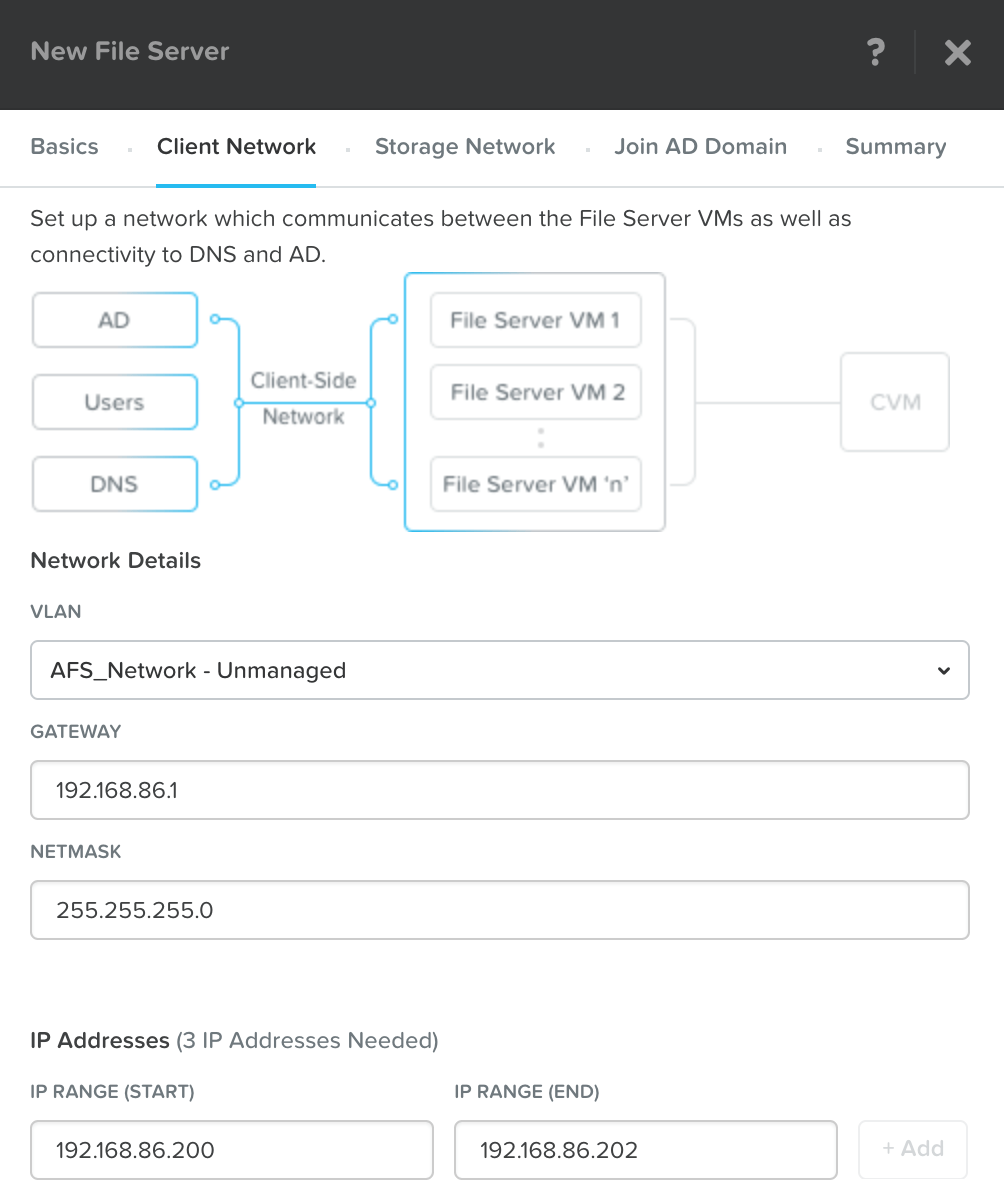
- Client side network: The external network enables communication between the Server Message Block clients to the FSVMs. This allows Windows clients to access the AFS shares. The external network is also used for AFS to communicate to the active directory and domain name servers.

High Availability
AFS provides two levels of high availability.
- Stargate path failures through Acropolis Block Services
- VM failures by assuming different VM resources
Domain
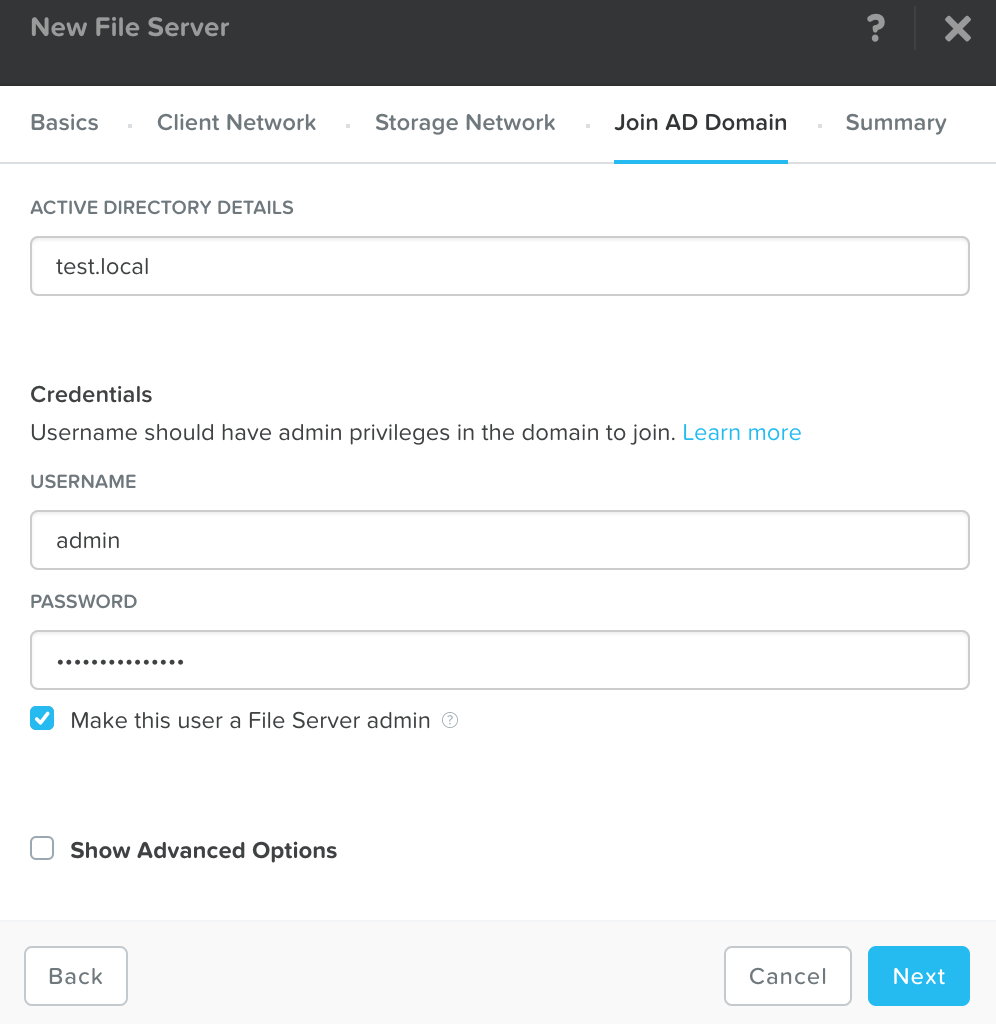
After AFS cluster is created, it joins the specified domain using the specified domain user credentials. Because AFS provides file services in a Windows Active Directory environment and needs to participate in domain security, it needs to be a domain member. A machine trust account, also known as “computer account”, is created in the Active Directory and is used to authenticate AFS to the domain controller server.
Cluster Storage Container
AOS creates a new storage container named NutanixManagementShare for Nutanix clusters for use with the Acropolis File Services features. This storage container is used by AFS for file storage, feature upgrades, and other feature operations. To ensure proper operation of these features, do not delete this storage container. Nutanix also recommends that you do not delete the NutanixManagementShare storage container even if you are not using these features.
Requirements
- Minimum 3 IPs for Client Network
- Minimum 4 IPs for File Server Virtual Machines (N+1)
- Download the latest AFS software in Prism Element
- Data Services IP setup in Prism Element
- At least 1 network available (2 recommended)
Documentation
Here is the full documentation provided by Nutanix.
Solutions Documentation – https://portal.nutanix.com/#/page/solutions/details?targetId=TN-2041-Acropolis-File-Services:TN-2041-Acropolis-File-Services
Release Notes 2.2.1 – https://portal.nutanix.com/#/page/docs/details?targetId=Release-Notes-AFS-v221:Release-Notes-AFS-v221
Installation Documentation – https://portal.nutanix.com/#/page/docs/details?targetId=Acropolis-File-Services-Guide-v22:Acropolis-File-Services-Guide-v22
Documentation requires access to the Nutanix Portal
Installation
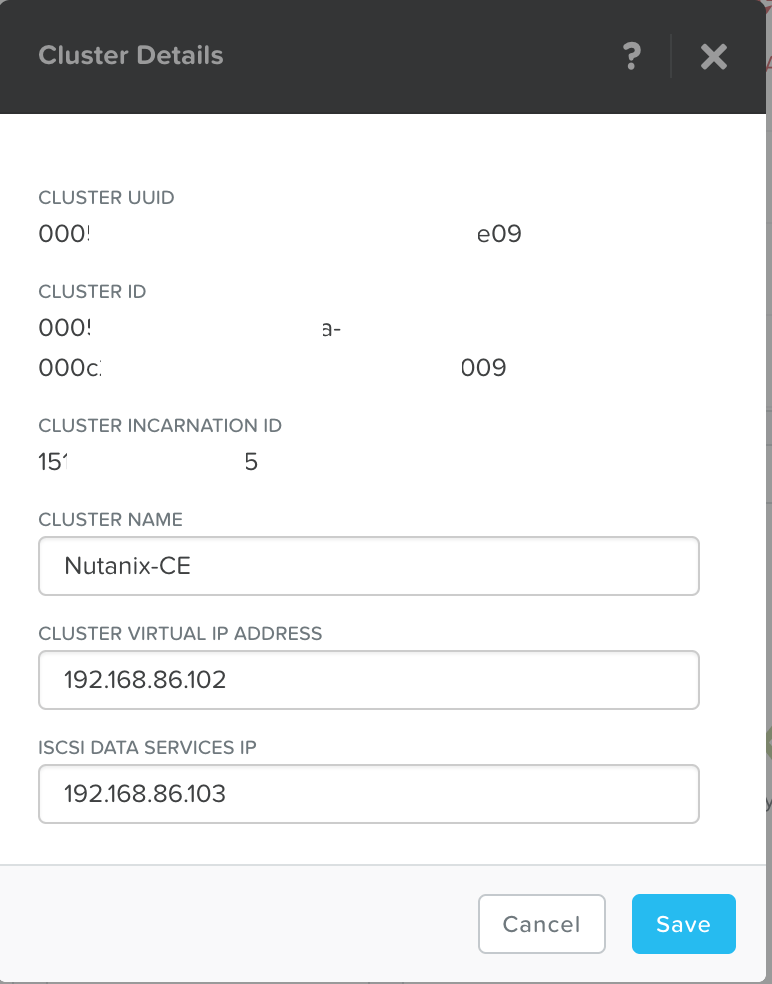
- Ensure a Data Services IP is setup on the cluster. This can be done clicking the ‘Settings Cog’ in the top right and then clicking ‘Cluster Details’

- ISCSI IP Added below
- Download the latest copy of the AFS server software. Software can be found in the ‘Settings Cog’ under ‘Upgrade Software’

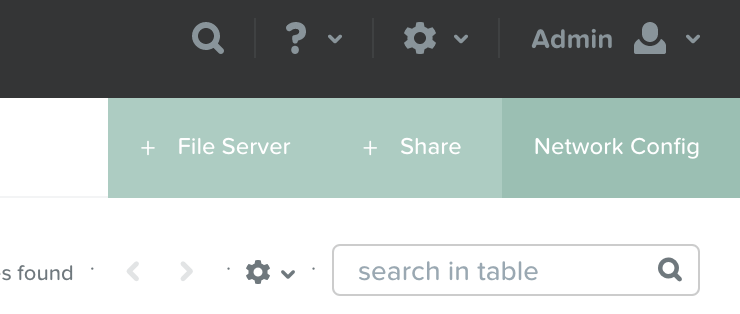
- Go to ‘Menu’ and select ‘File Server’

- Click on ‘Network Config’. AFS requires at least one network defined but recommends at least two. In a production environment I would follow this advice but for my POC I will only have one.
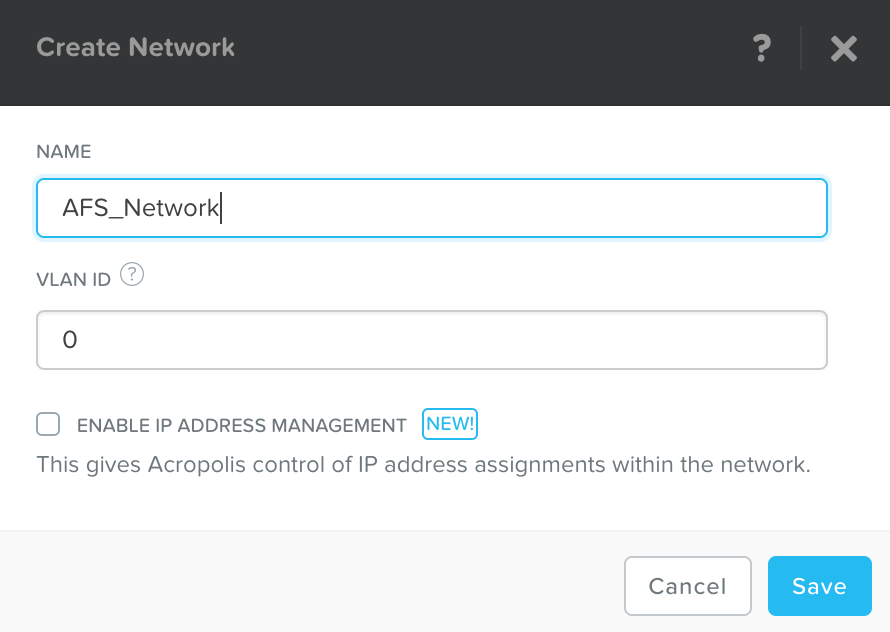
- In the Network Config dialog box add in the networks you would like to define. First click on ‘+ Create Network’. Add Network Name and the VLAN ID. In my POC I’ll use vlan 0. If I wanted since am using AFS I could enable IP Address Management. It would let me define the Network range, create an IP address pool, configure domain settings and override the DHCP server
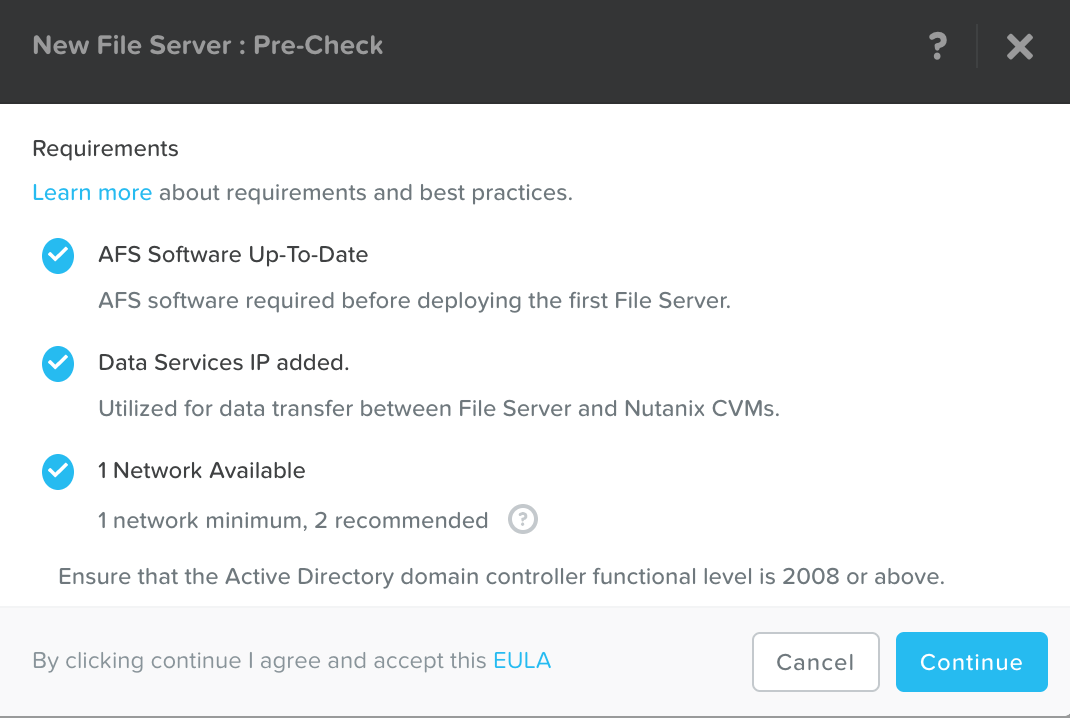
- Now click on ‘+ File Server’

- All the pre-requisites should now be passed so click ‘Continue’
- Name the File Server configuration and define how much storage that you would like to add the File Server. I would say leave the performance configuration as a standard deploy but you are able to add extra File Servers increase the vCPUs and Memory per File Server if you wish. Click ‘Next’ once you are happy with the details

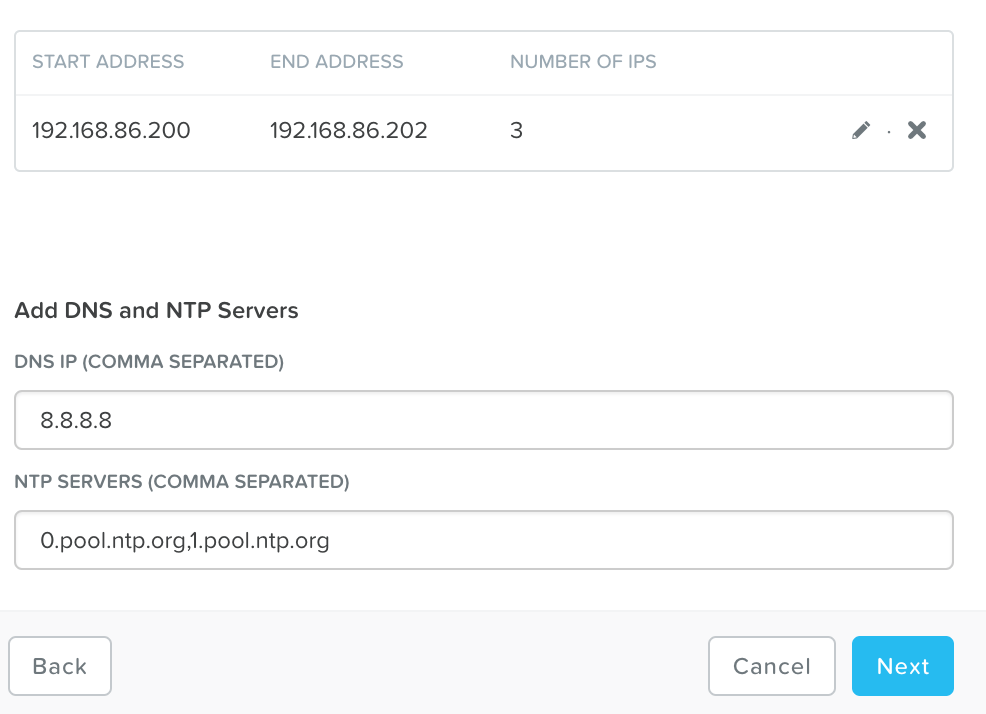
- Next steps to add your VLAN you defined earlier, put in your IP details (3 IPs are required), add DNS and NTP. This is the network your clients and services will use to connect to the File Server cluster
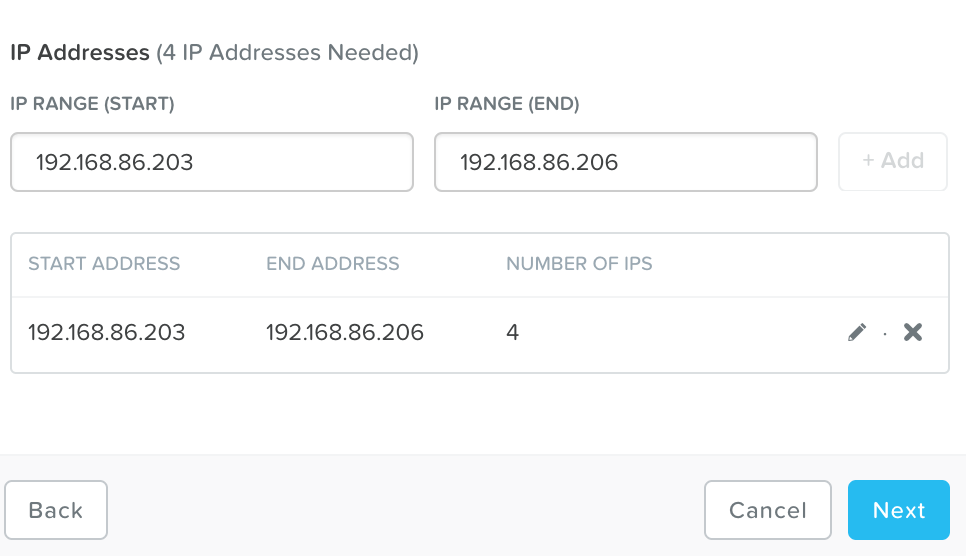
- 4 IPs are required for the Storage Network. In a Production environment this would be a different network but as this is a POC I have used the same network as earlier. This is the network that the File Servers and the Nutanix CVMs use to communicate on
- Next step is to enter the AD details
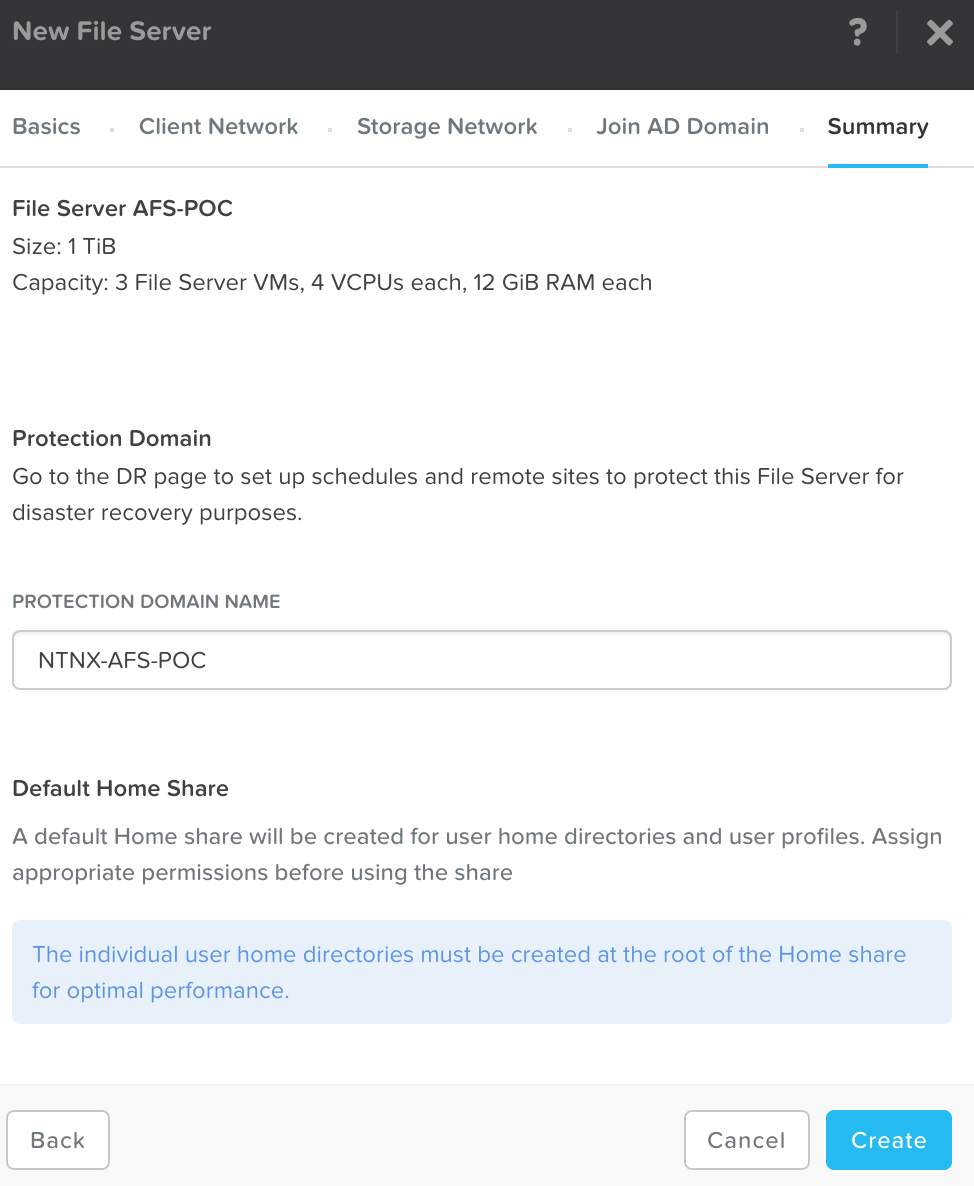
- Last page will be a summary where you can check your details entered before clicking ‘Create’
- The File Server will now be created. It will take a short while since it needs to stand up three File Server VMs and create the file share.
- Once complete go back into Menu -> File Server. You’ll find in the ‘File Server’ tab that your AFS cluster is now configured.
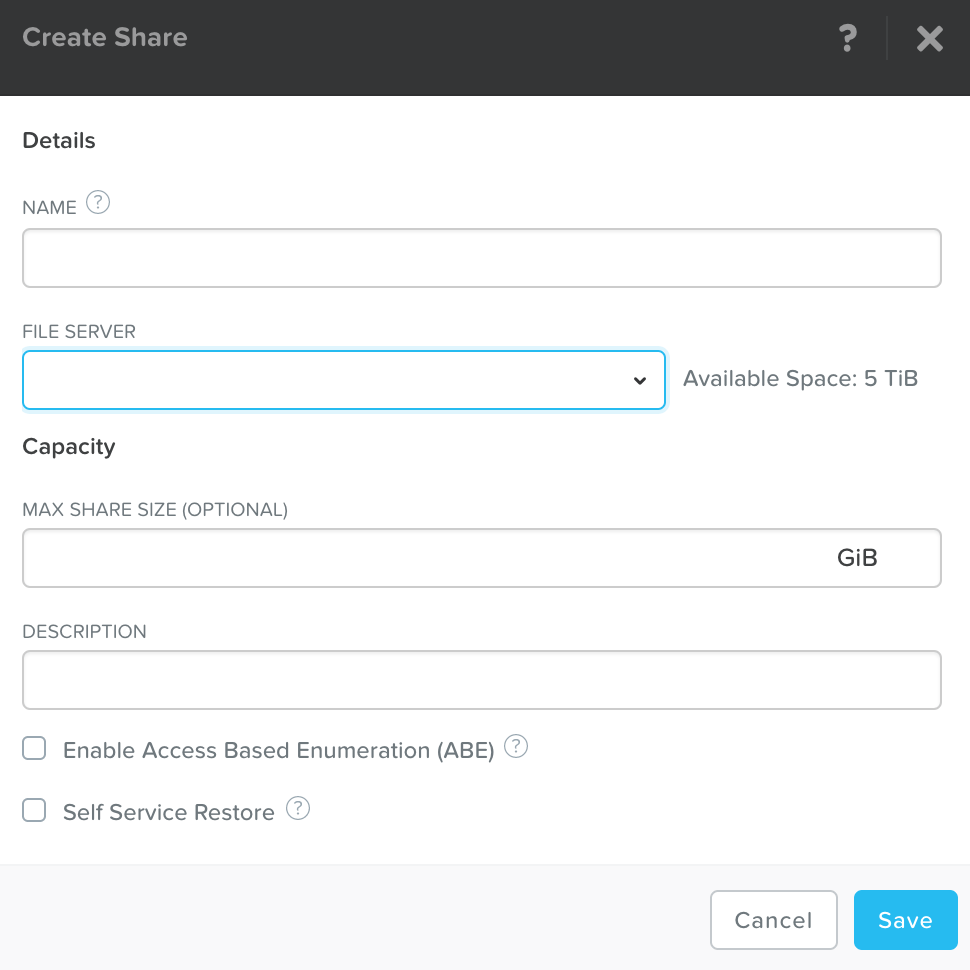
- Click on ‘+ Share’ to create a share.
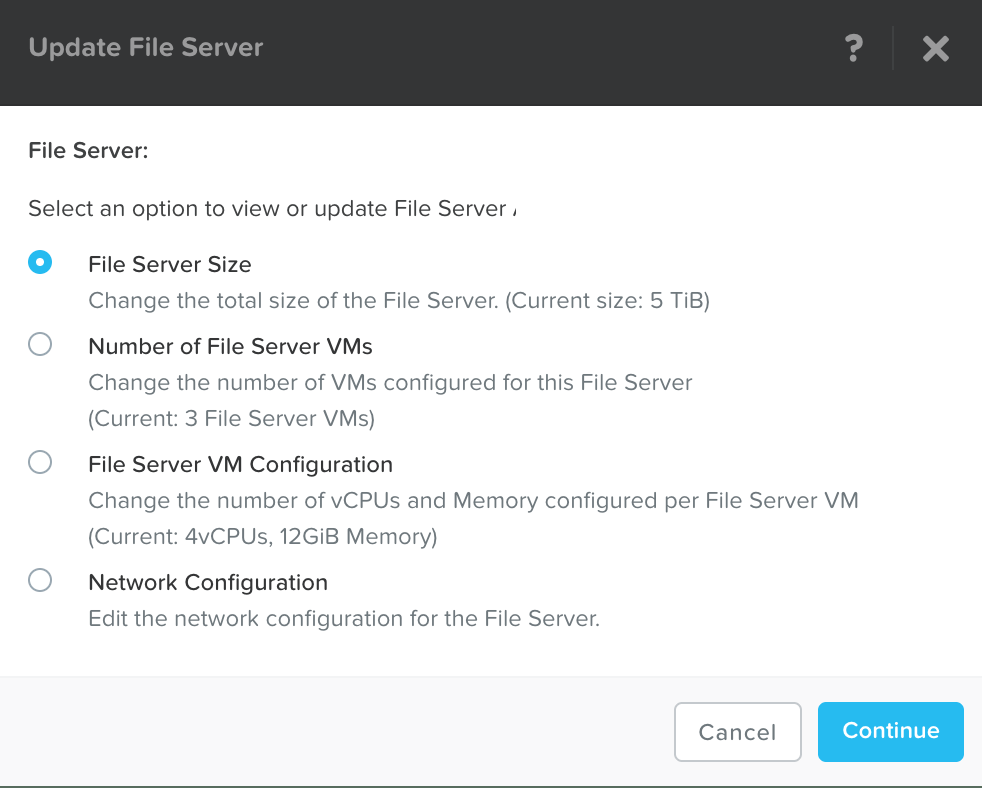
- Click on ‘Update’ to change the configuration of the cluster including adding more File Servers
- Click on ‘Protect’ to check and modify backup schedule. A local Protection Domain is create as part of the initial deployment. This can be looked at by going to Menu -> Protection Domain -> Table tab
- Click on the ‘Share’ tab and you’ll see a Home share has already been created and any others you might have created on the other tab
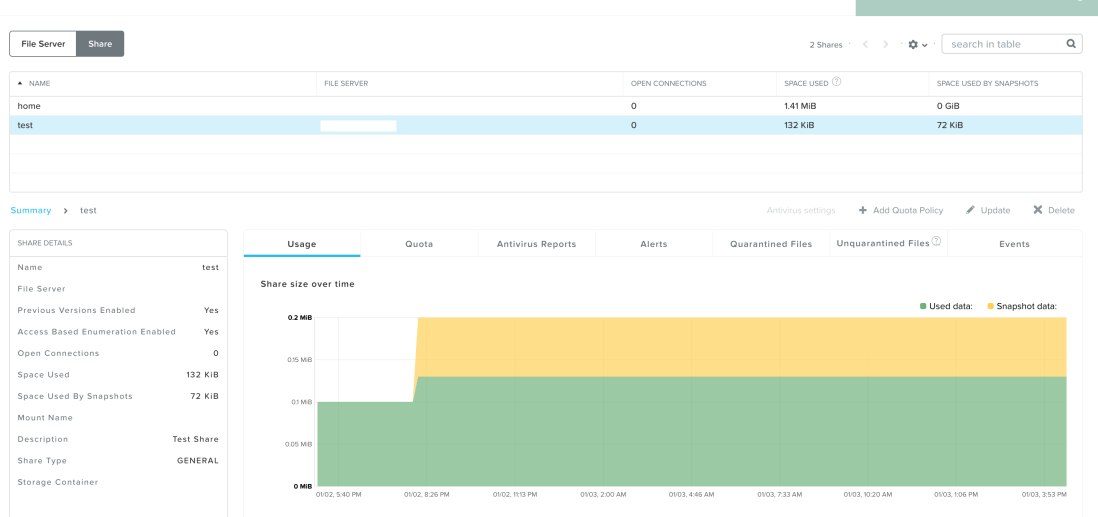
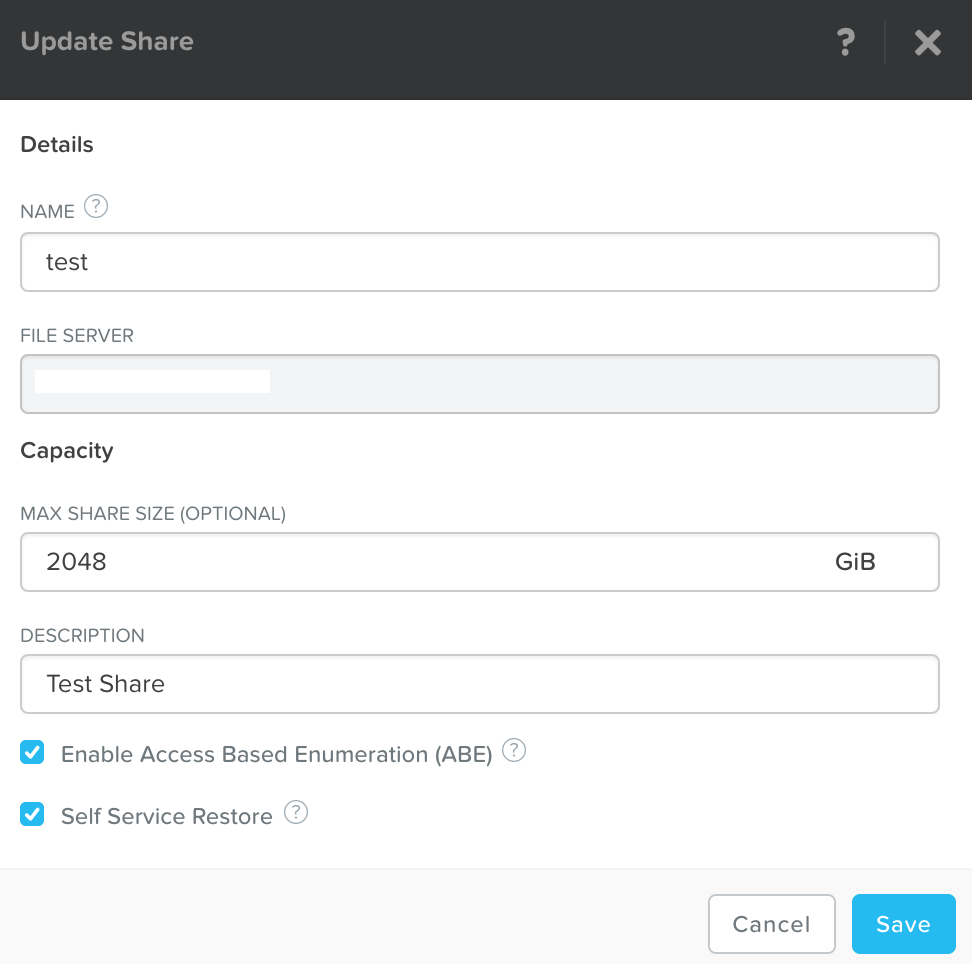
- By highlighting a share and pressing ‘Update’ lets you modify the share
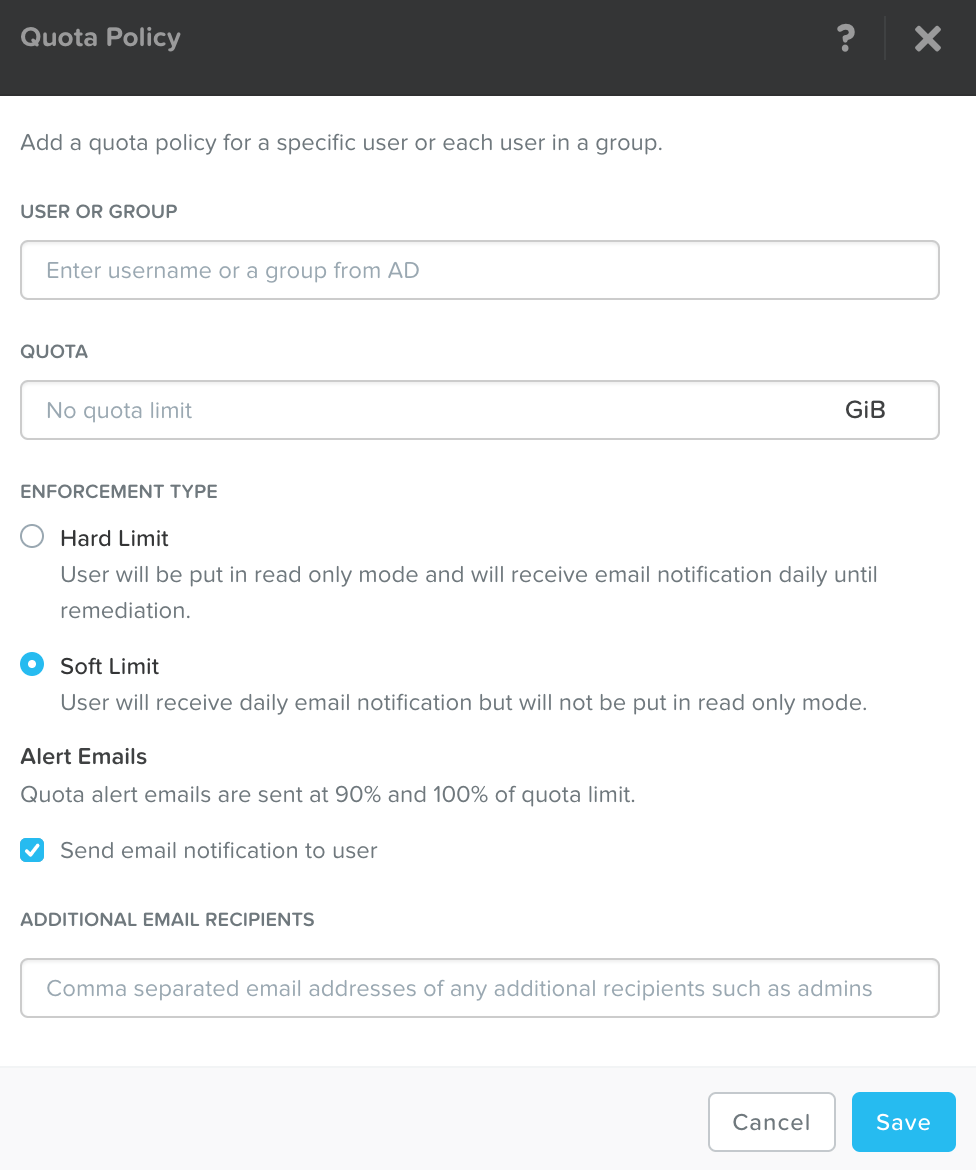
- Clicking ‘+ Add Quota Policy’ lets you apply a quota to your share
I think that covers setting up a new AFS cluster and a basic run through.
I’ll put together another post on how to setup remote disaster recovery and the process to recover at a later date.
