This the process for deploying a patch update to vCenter 6.5 via a downloaded ISO from the VMware site.
Preperation
- Download the vCenter Patch ISO from here (a My VMware account will be required to obtain the patch). Choose the application and software version required from the drop down menus to get the correct patch. In this example the latest patch version below for the appliance would be: VC-6.5.0Ud1-Appliance-Patch

- Once the patch is downloaded it needs to be uploaded to a storage datastore. Log onto the vCenter that contains the vCenter appliance that needs to be upgraded and upload the patch ISO to a storage datastore with enough space. You might have a dedicated ISO datastore.
- While the ISO is uploading take a snapshot of the vCenter appliance in case a roll back is required

- Make sure you give the snapshot a name that will help you remember what it is

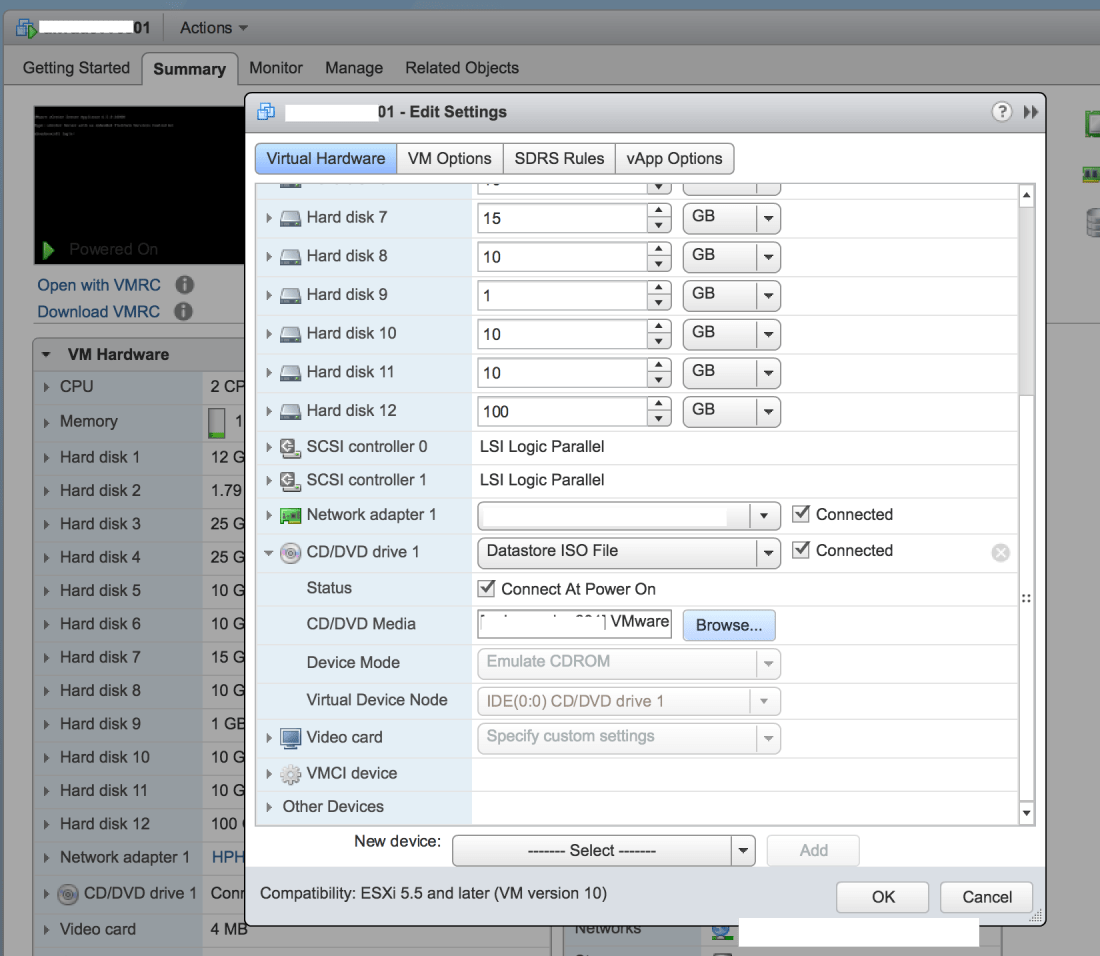
- Once the ISO is uploaded it needs to be attached to the vCenter Appliance. Go to Action -> Edit Settings

- Drop down the CD/DVD Drive 1 option and choose ‘Datastore ISO file’ and browse to the location of the uploaded ISO and choose it. Clicking ‘OK’ will save the new settings and attach the patch ISO to the VM. Make sure ‘Connected’ is ticked.
Upgrade
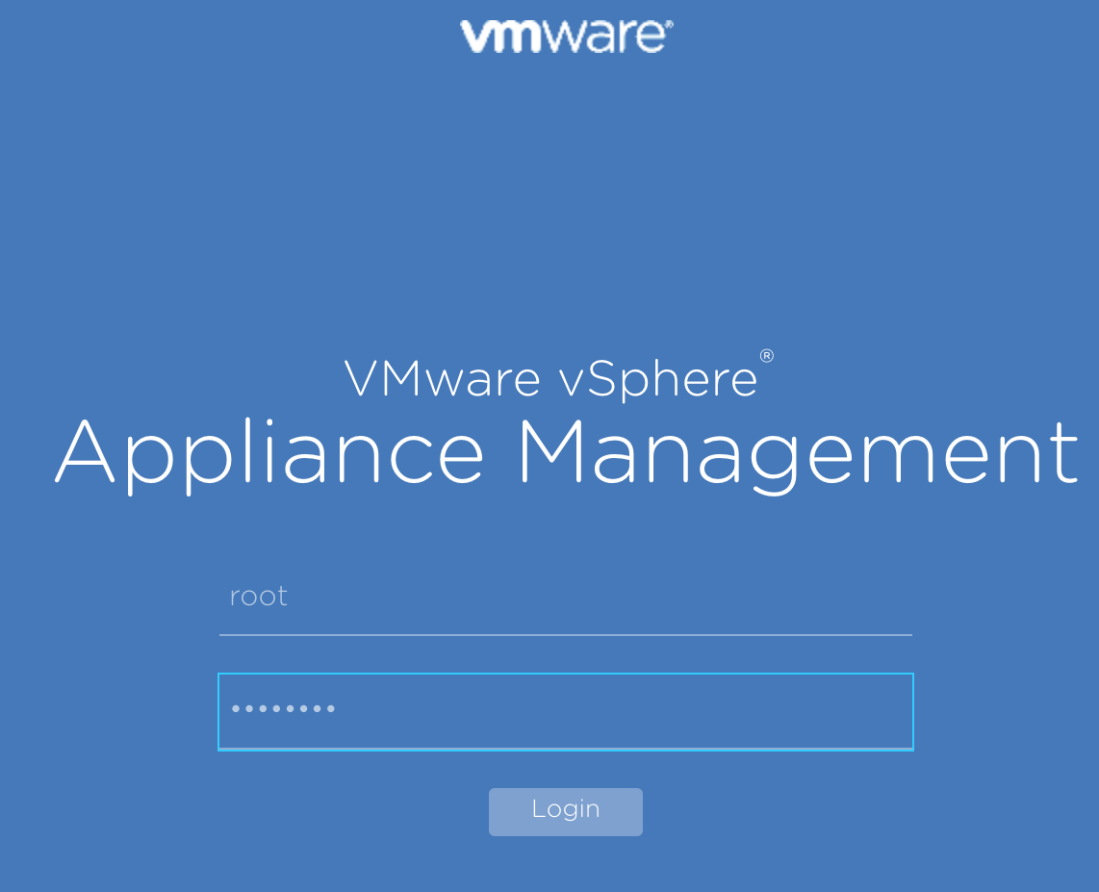
- Open a browser and type the vCenter name or IP with :5480 at the end of the URL e.g. http://vcentername01:5480
- This will open a logon prompt for the vCenter Management Console. It requires a ‘Root’ account
- Click on ‘Update’ in Navigator on the left then click ‘Check Updates’ on the top right and choose ‘Check CDROM’
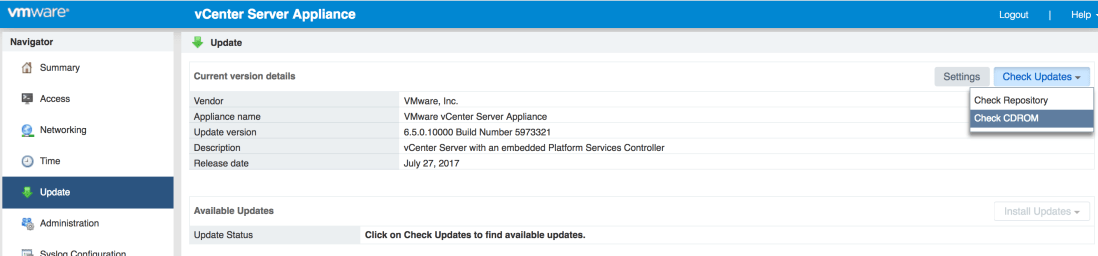
- The scan should discover the patch ISO and bring back information on the patch to be applied. Check the information is correct before progressing the upgrade. Click ‘Install CDROM Updates’ when ready to start the upgrade. If the update doesn’t appear check the ISO is connected correctly or that the correct ISO has been downloaded

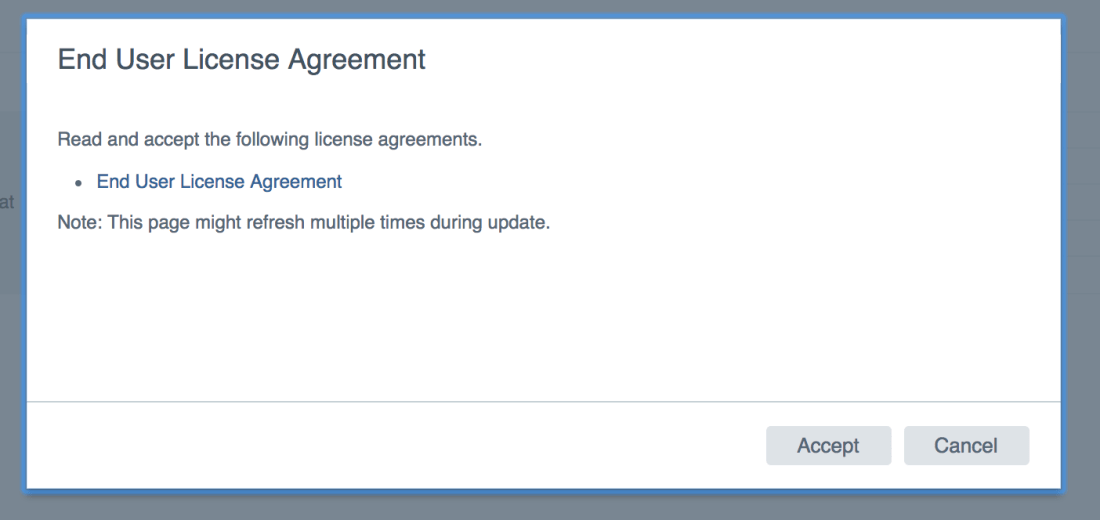
- Accept End User License Agreement
- Click ‘Install’ to start upgrade at the next screen – opt in or out of the VMware CEIP

- Progress Bar will then appear explaining the stages of install
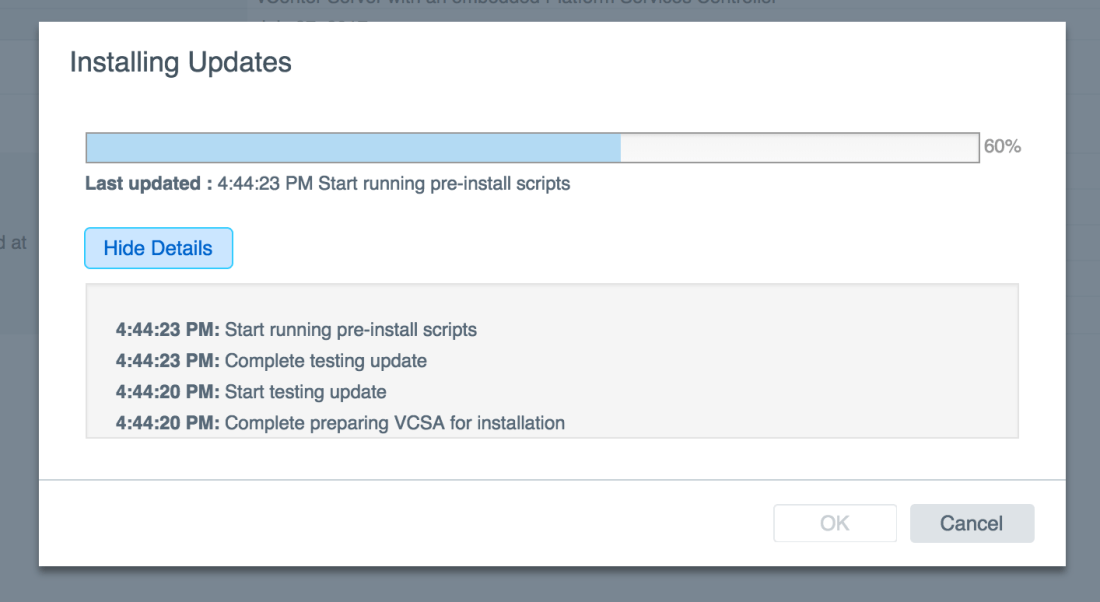
- Once complete click ‘OK’ to close the dialog box

- Browse to ‘Summary’ in the Navigator and click ‘Reboot’. The user session will be ended while vCenter reboots

- Once the reboot is complete log back into the Management Console and ensure the right upgrade version is installed

Clean Up
- Disconnect ISO and remove the ISO from Datastore if desired
- When happy the vCenter is performing correctly delete the snapshot that was taken. It is not recommended by VMware to keep a snapshot for any longer than 72 hours

One thought on “Patching Process for the vCenter 6.5 Appliance”