Introduction
Due to the limited capabilities of the Image Service built into Prism Central it is difficult to share an image to a cluster and it is also not possible to export an uploaded image.
There are improvements coming in the next release 5.11 but in the meantime this article explains the procedure for exporting an uploaded image from a cluster.
Procedure
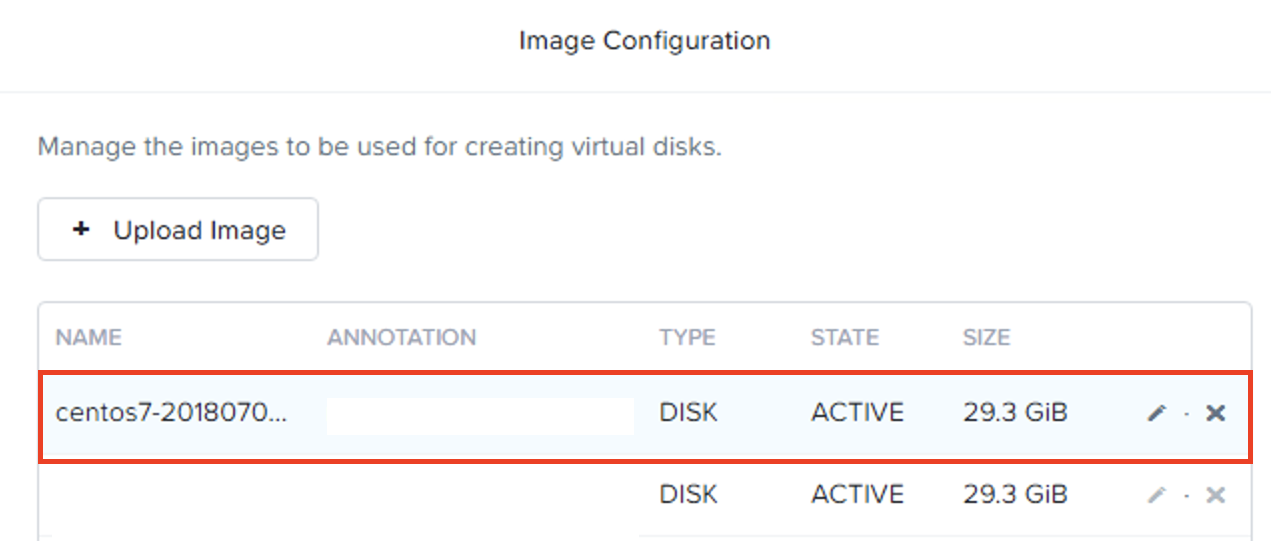
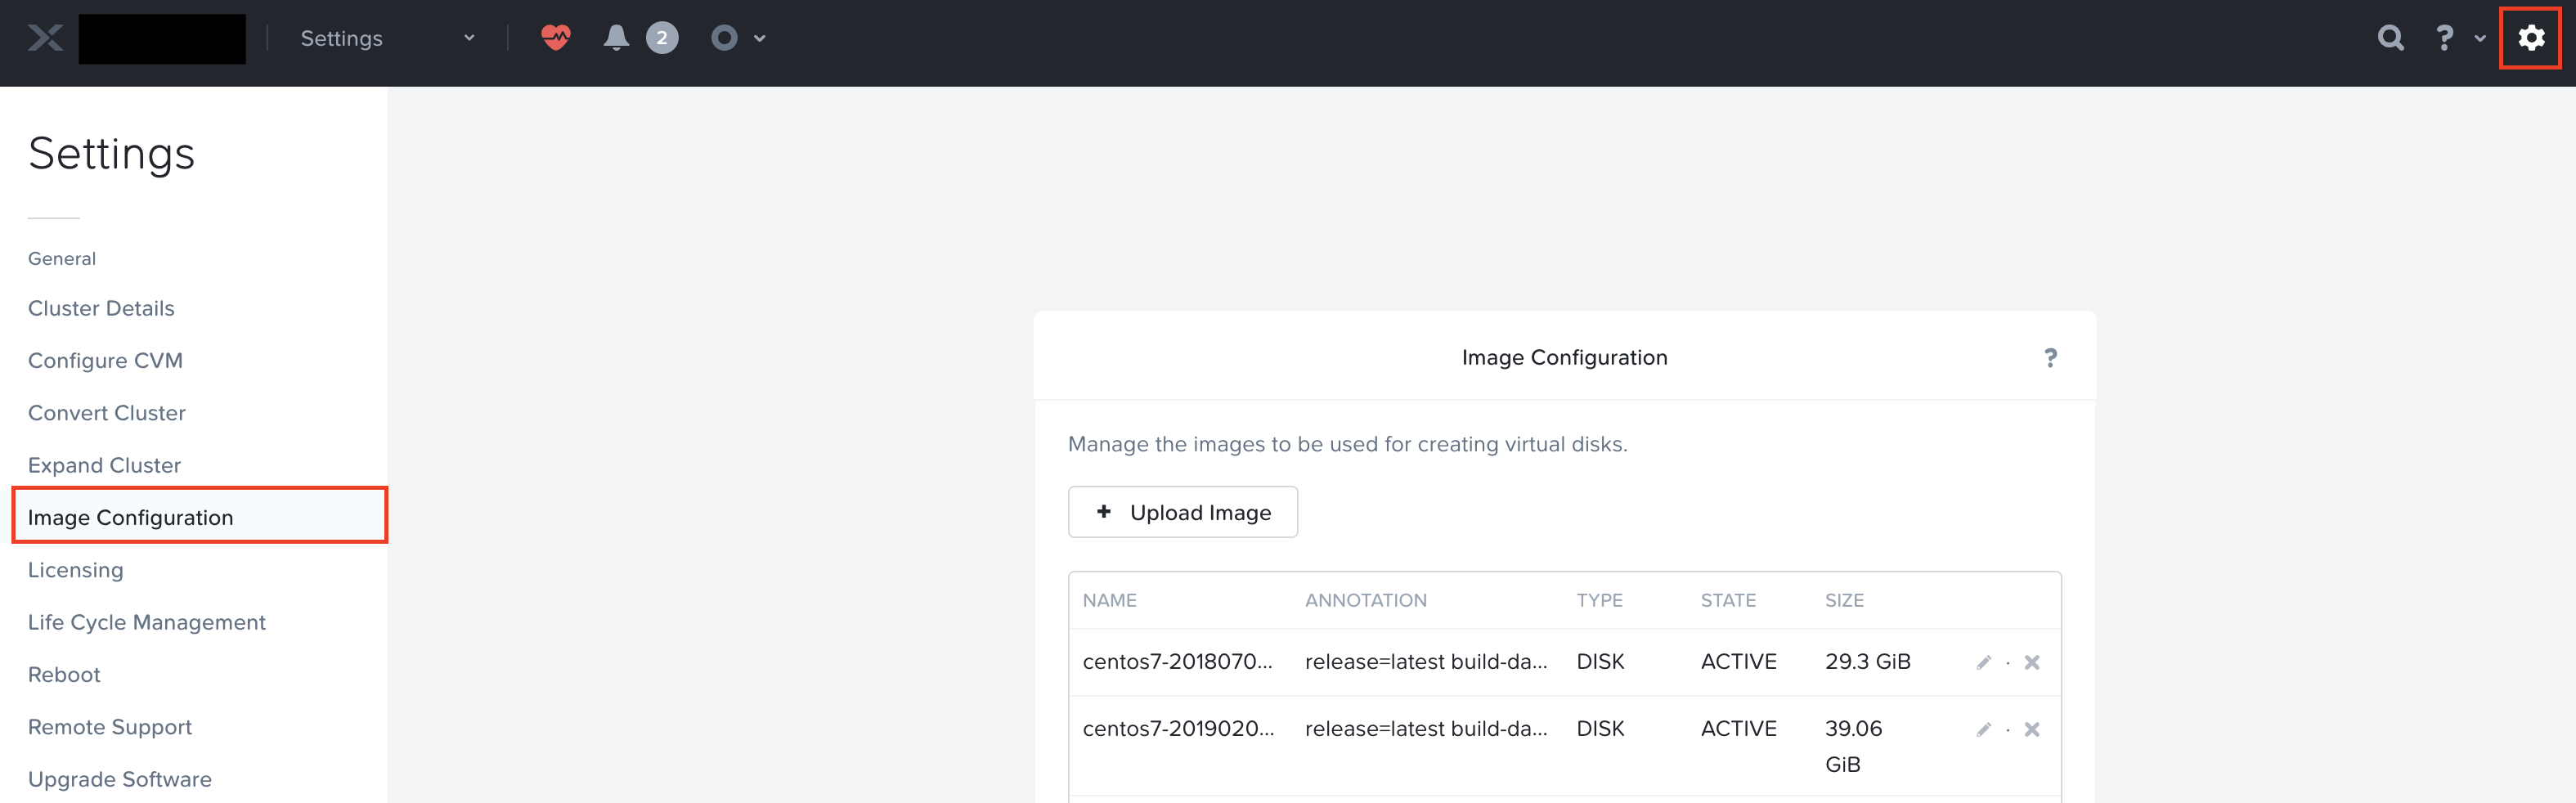
- Find a cluster that has the image you are looking for. The images can be found in Settings → Image Configuration
- Log onto a CVM on the cluster. Firstly the firewall for port 2222 needs to be opened up on the CVM. Use the following command:
nutanix@NTNX-2LTDXXX-A-CVM:172.24.155.1:~$ modify_firewall -f -o open -i eth0 -p 2222 -a- Next the UUID number of the image needs to be found this can be done with the following command:
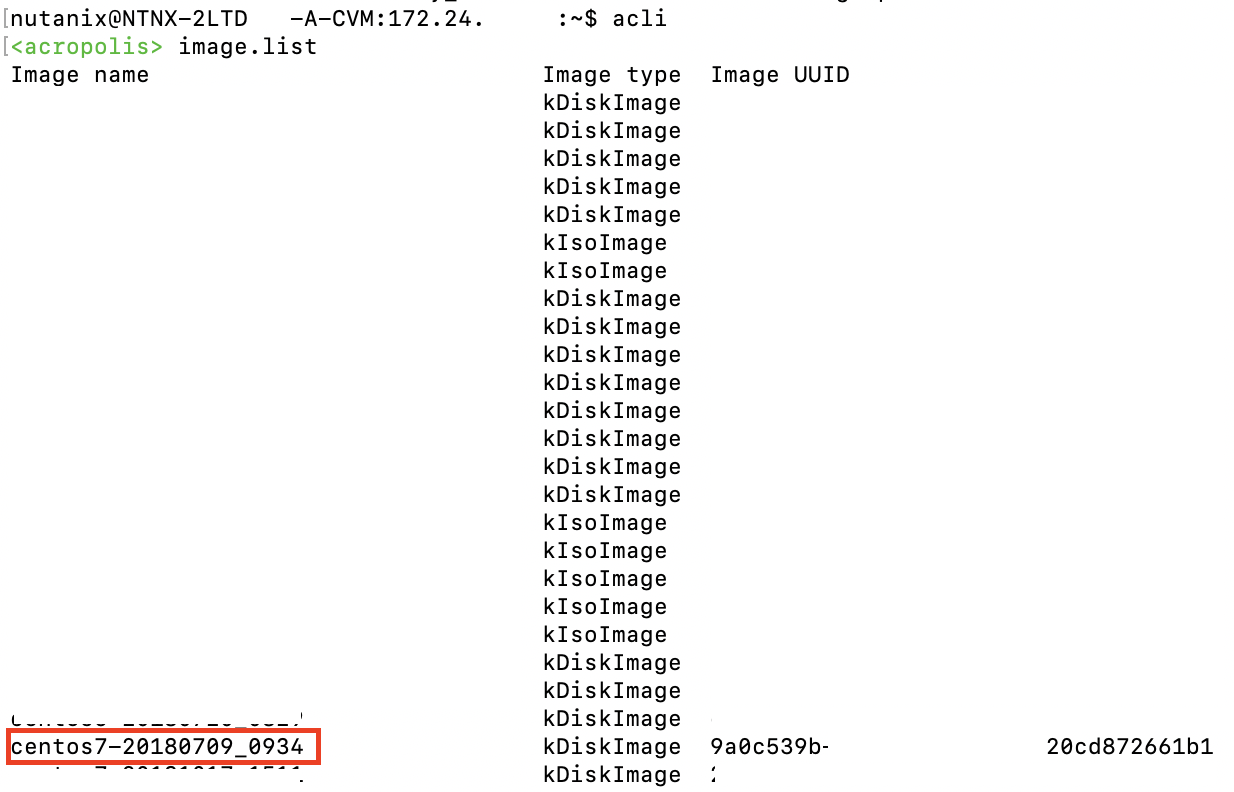
nutanix@NTNX-2LTDXXX-A-CVM:172.24.155.1:~$ acli

<acropolis> image.list- A list of all the images on the cluster will be displayed. Make sure the image you want to export is on the list. In this example I’ll use build – centos7-20180709_0934
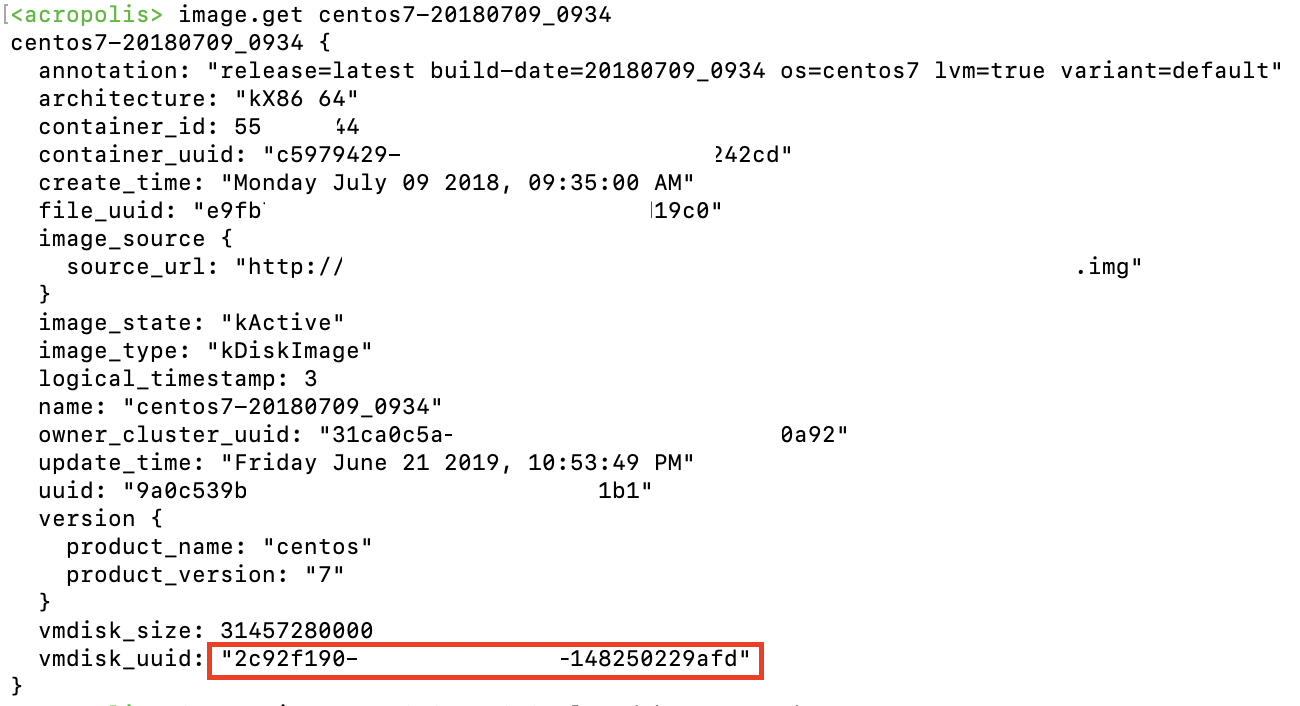
- To get the UUID number of the image run the following command
<acropolis> image.get centos7-20180709_0934- The output will look like this. The UUID is found at the bottom of the output
- Now switch over to a machine that has WinSCP installed. Ensure the latest release of WinSCP is installed
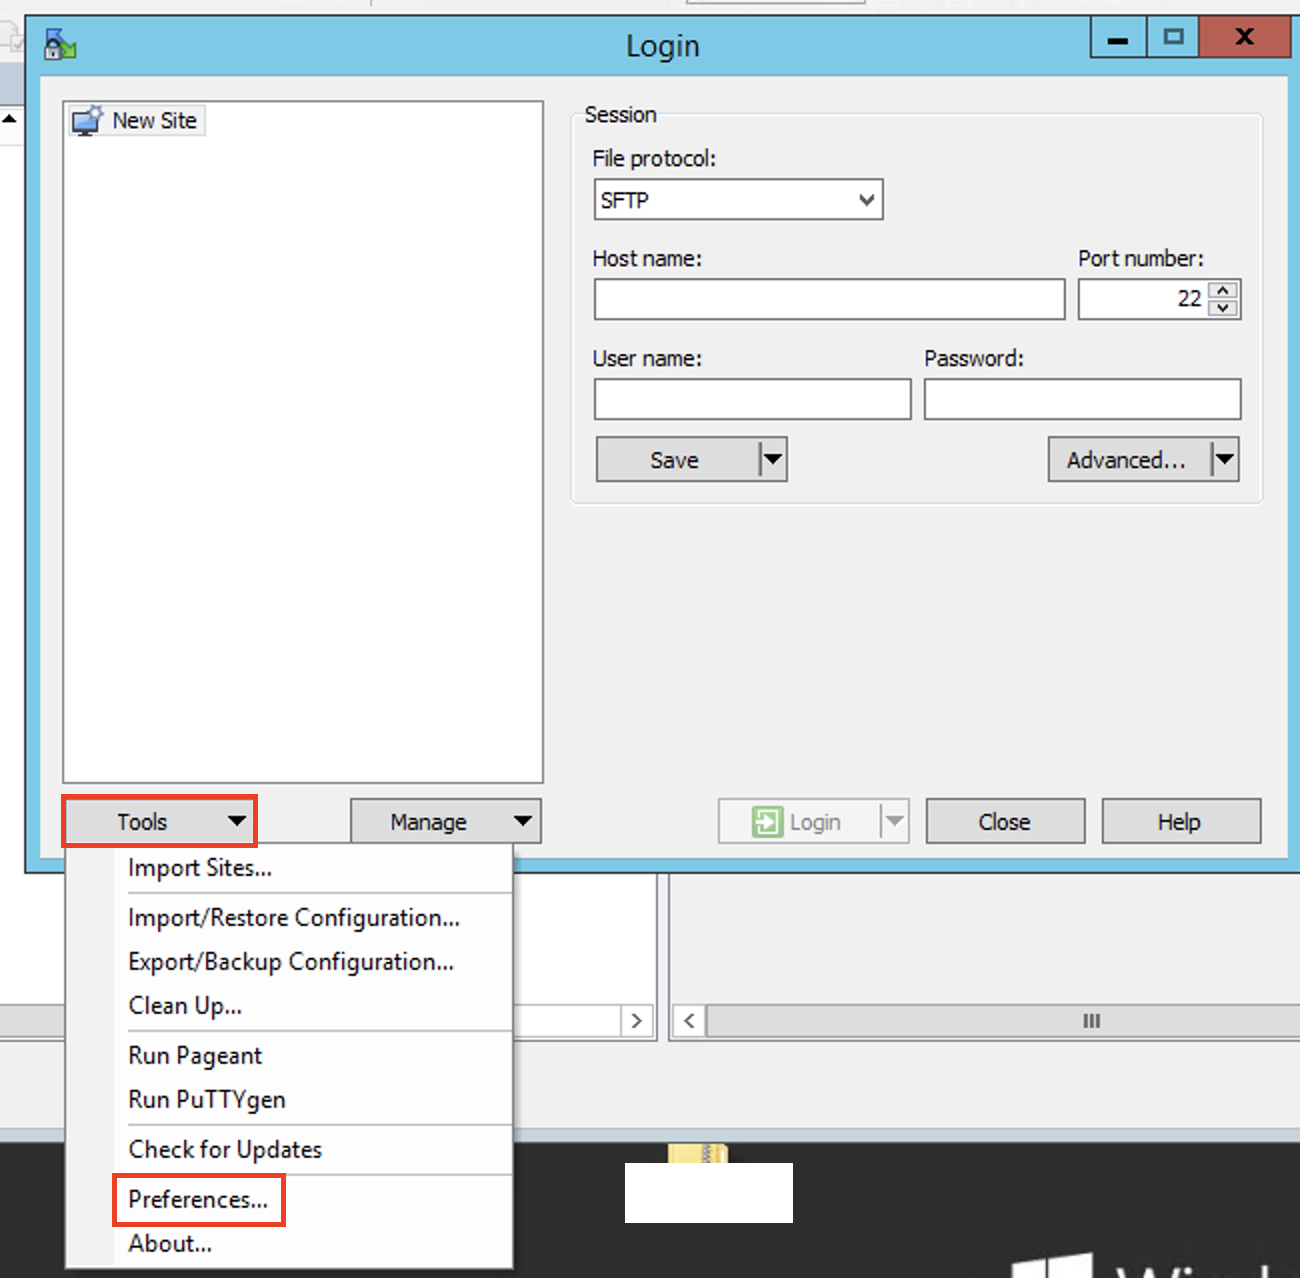
- Open WinSCP and go to Tools → Preferences…
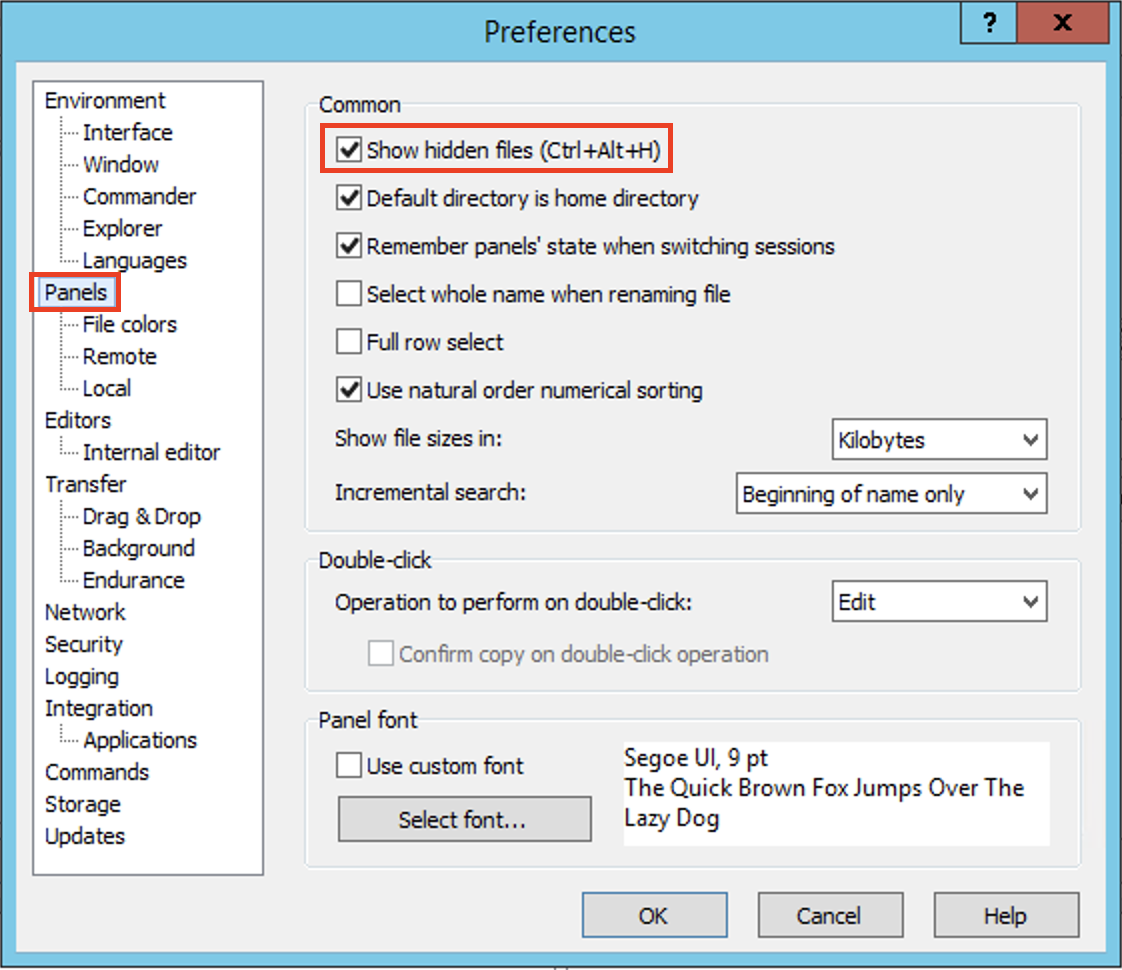
- Click on Panels. Make sure Show hidden files check box is ticked. Click OK to exit
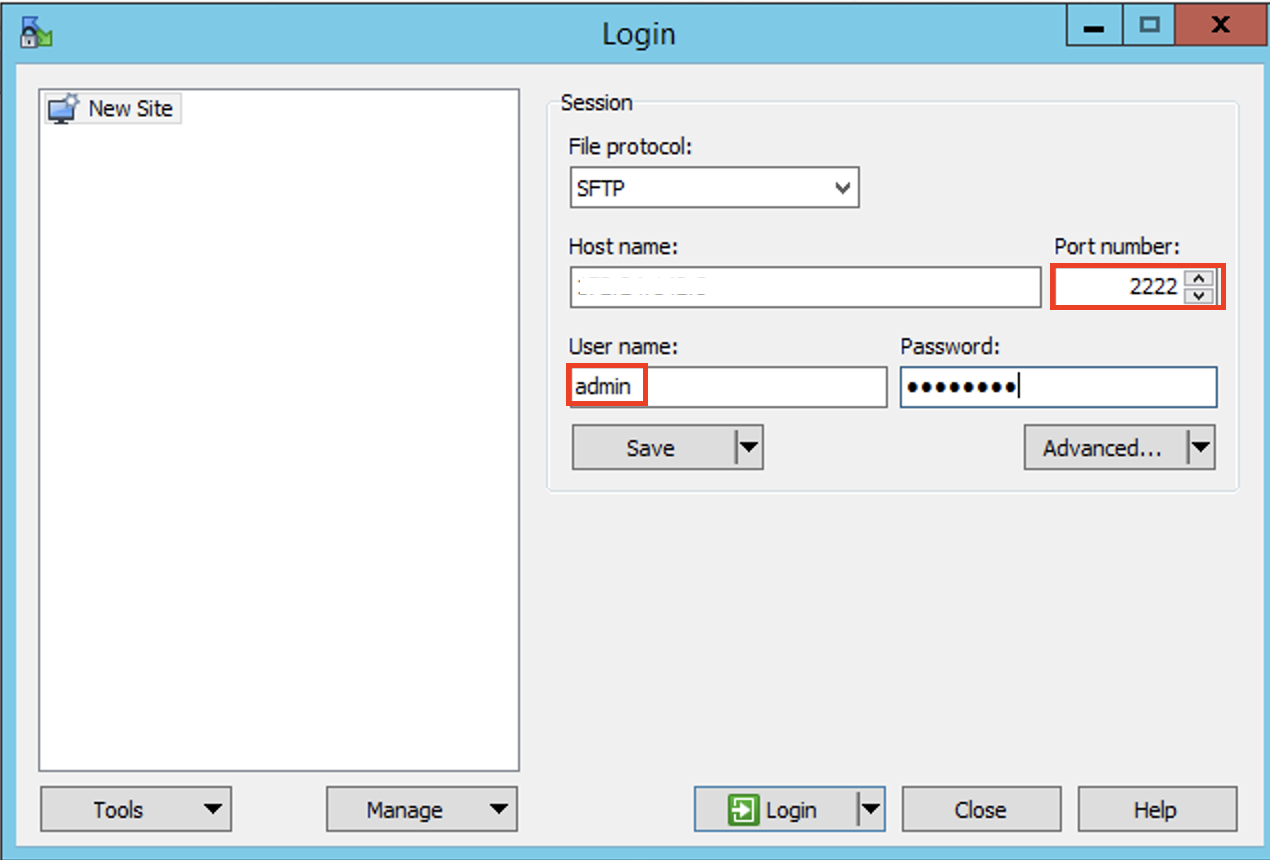
- Log onto the CVM with Port 2222 where the firewall was opened. Use the cluster admin credentials and not the Nutanix CVM account.
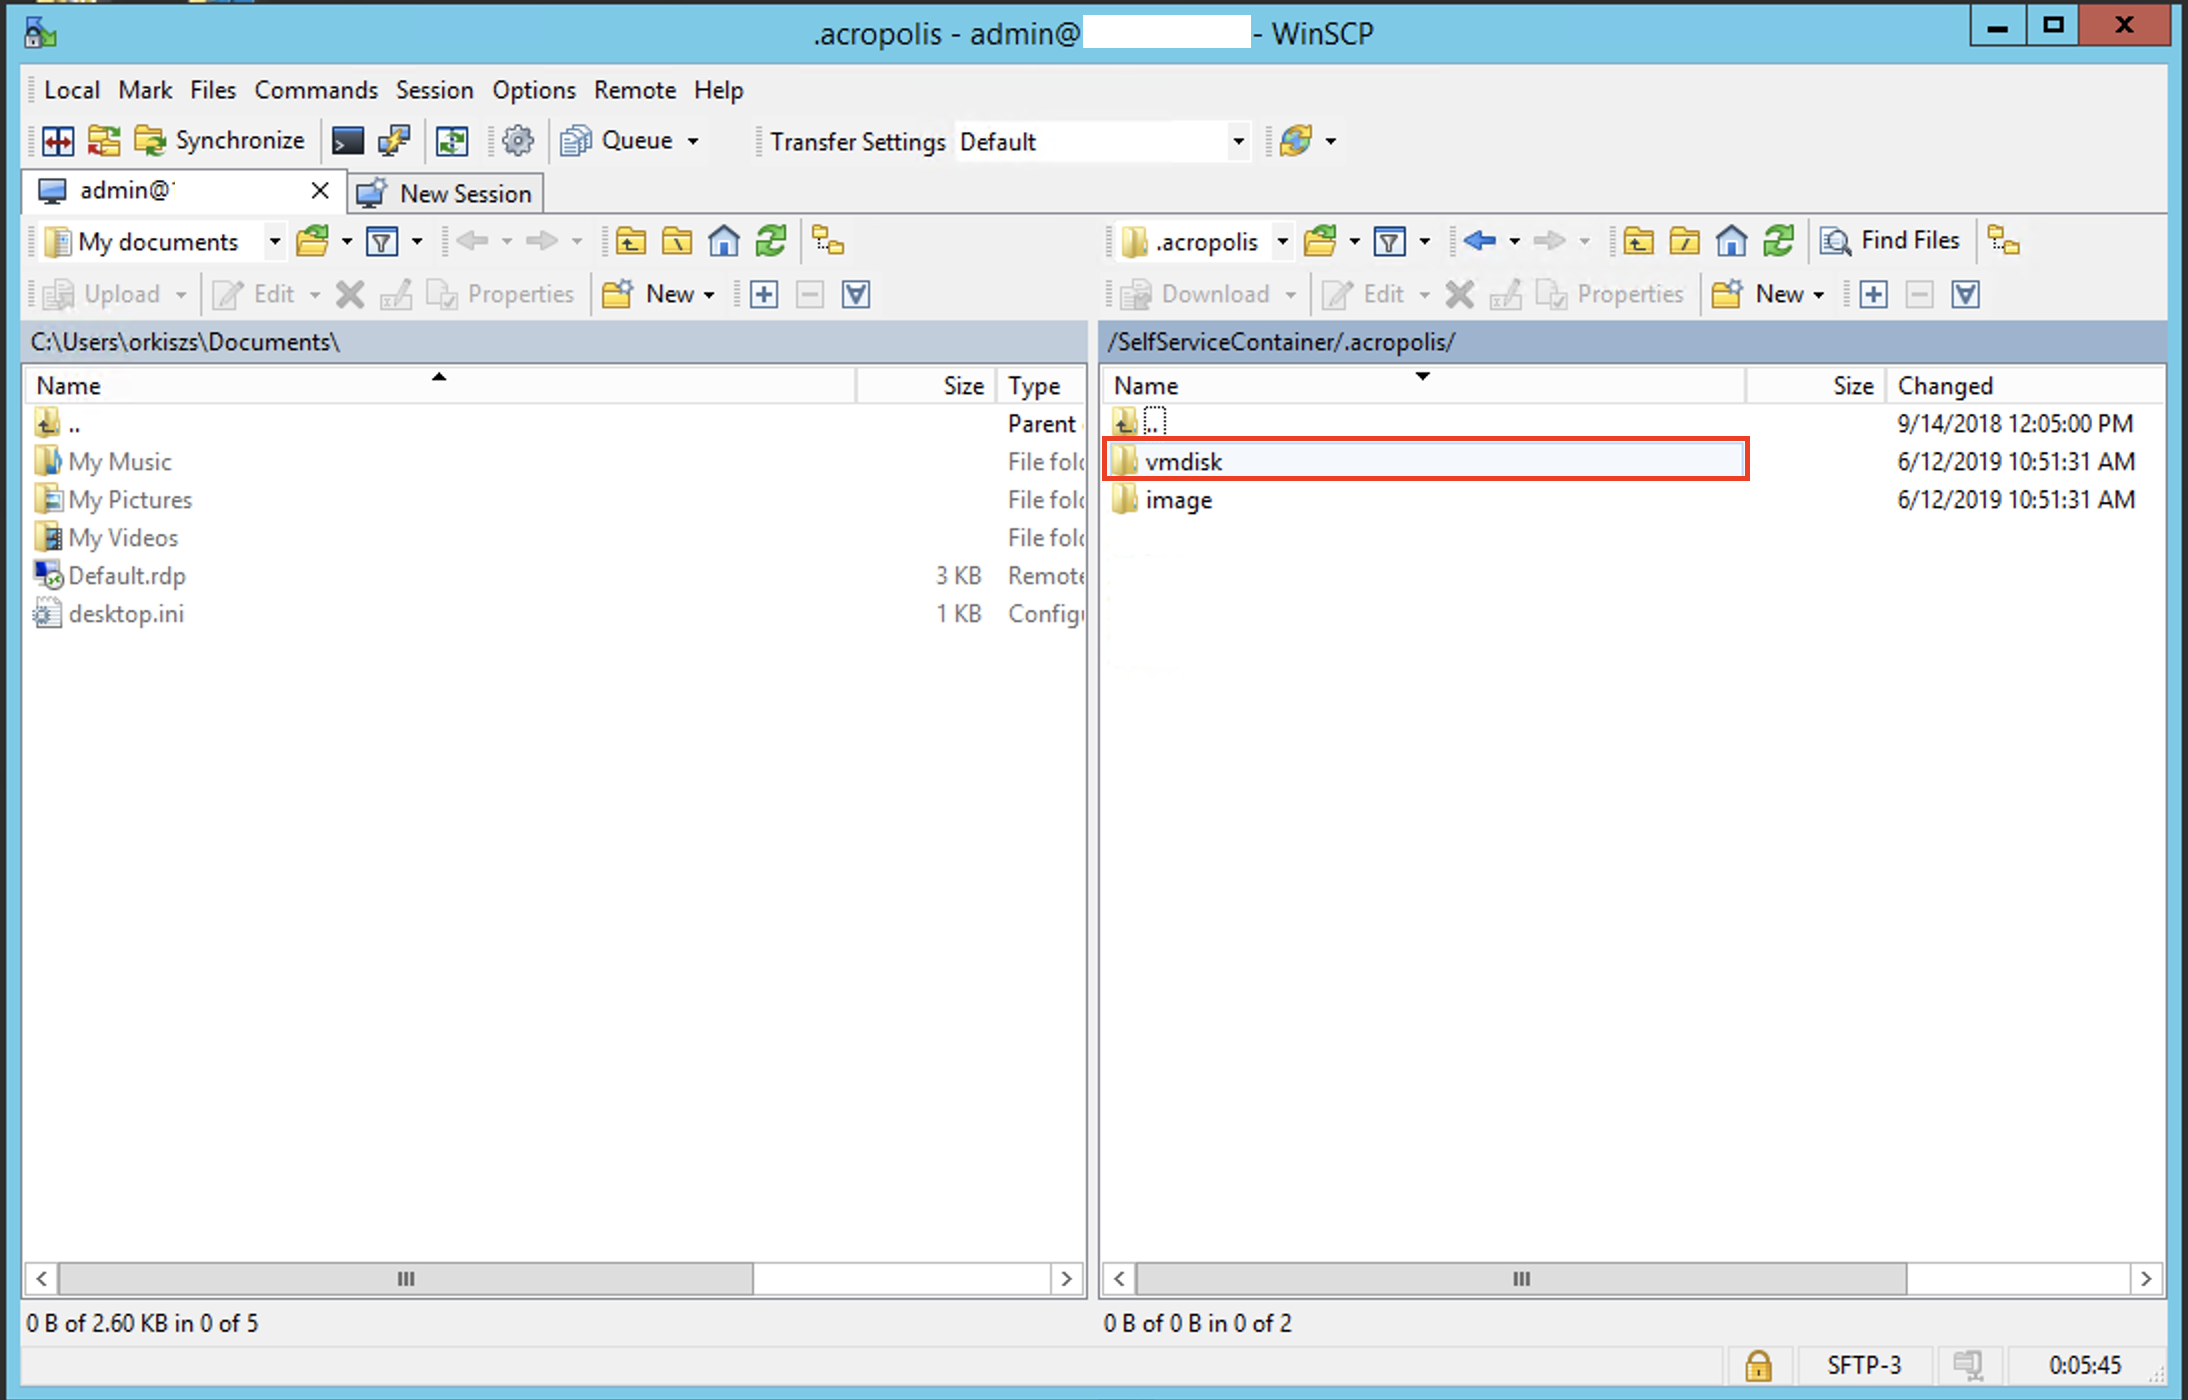
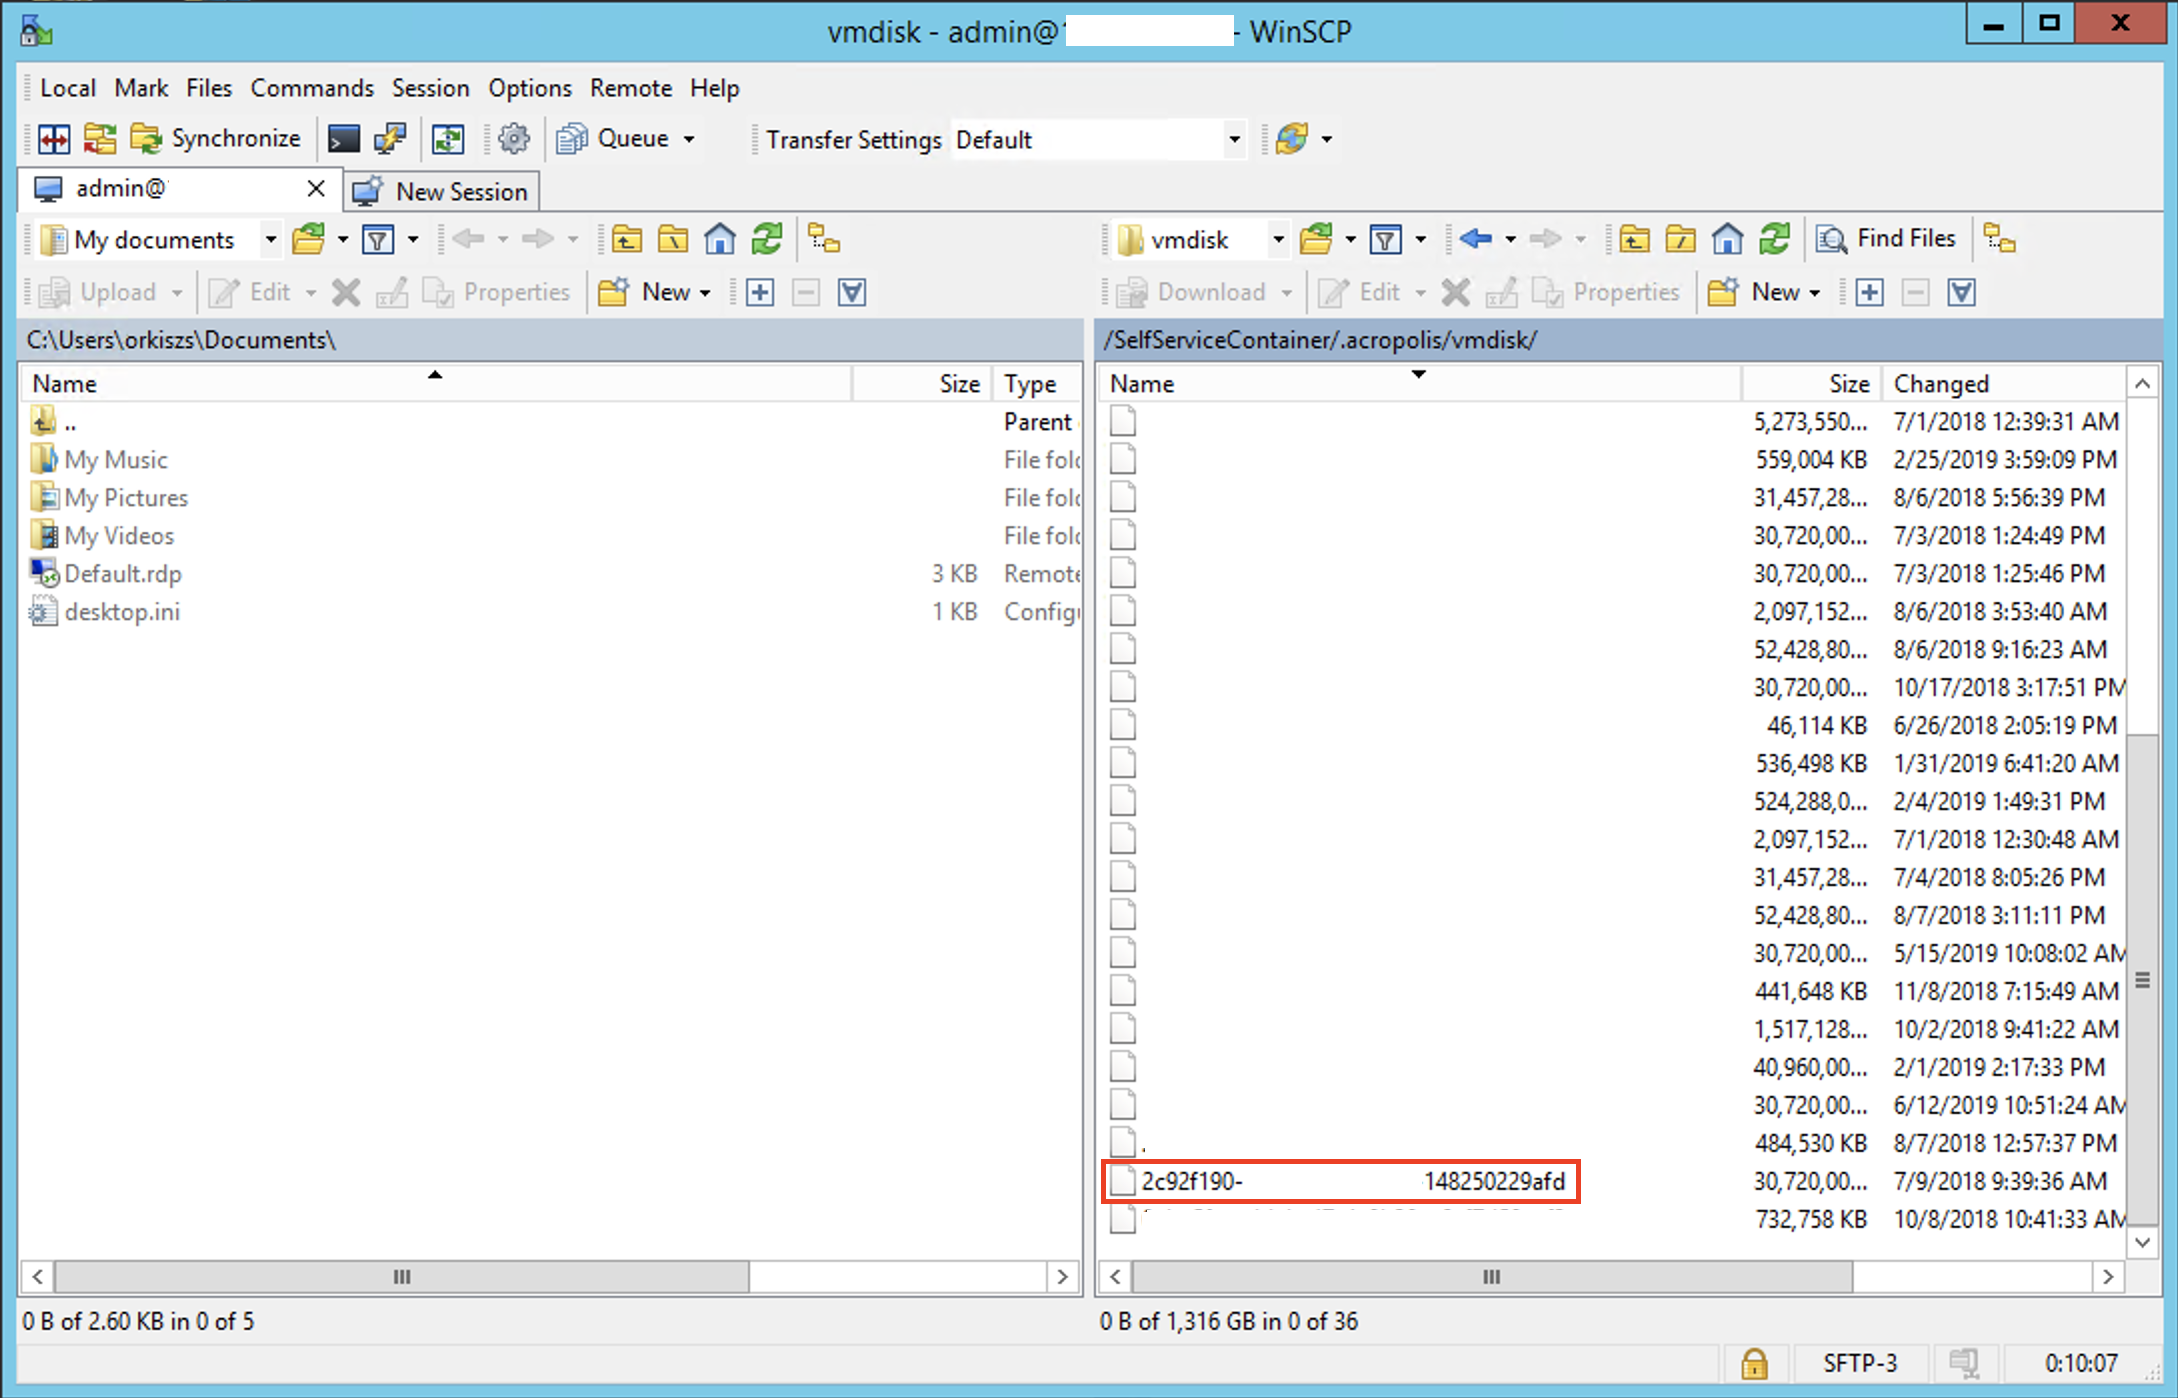
- There might be a bit of browsing required to find the image but generally the images are found in the ServiceServiceContainer. The images are found under ./acropolis/vmdisk

- Click vmdisk
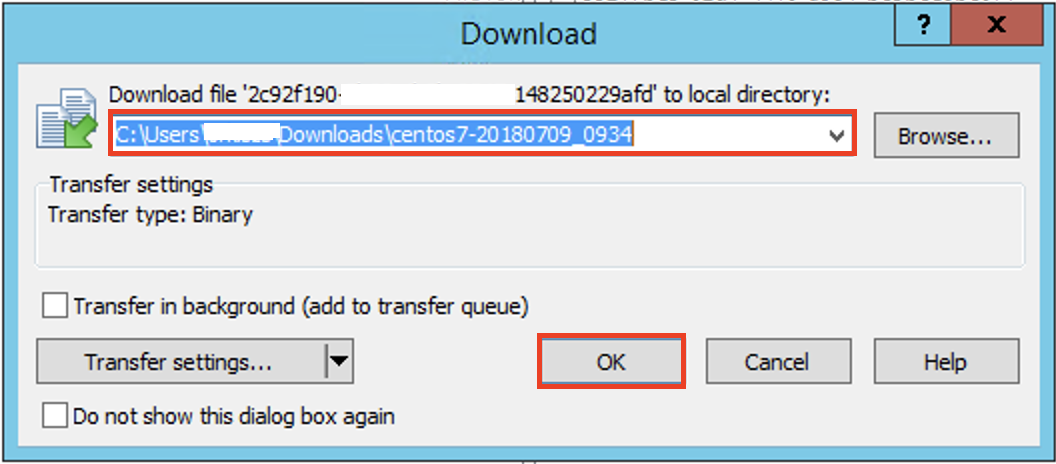
- Locate the UUID of the image.Click on it and pick the Download drop down then Download
- Rename the image and start the download. Once complete close the connection to the CVM
- Log back onto the CVM where the firewall was opened and close down port 2222 with the following command
nutanix@NTNX-2LTDXXX-A-CVM:172.24.155.1:~$ modify_firewall -f -o close -i eth0 -p 2222 -aImport Image to Prism
Now the Image has been downloaded it can be uploaded to any other Nutanix Cluster or Prism Central. This is the procedure to complete this task.
- Log onto the Nutanix Cluster and go to Settings → Image Configuration → + Upload Image

- Fill in the details of the image that is to be uploaded. Information can be found on the cluster the image was exported from. Click Save

- The image will start to upload. Depending on size of the image and location of where the image is being uploaded the task could take a couple of hours. Progress can be checked under tasks in Prism

- Once complete go back to the Image Configuration and make sure the image is now in the image list and in an active state. It is ready to be used.